Hi all,
In this last part of the blog series about Azure DevOps for the Ops consultant I want to show you how to create the release pipeline for Azure deployments. The release pipeline is where the code written gets into the environment where it is used. Normally the first release pipeline would push to the development environment, but with all the different ways that companies use separate environment you will need to figure out how you want to do it. What I will show you here is deployment to a single environment.
Let us get into the setup.
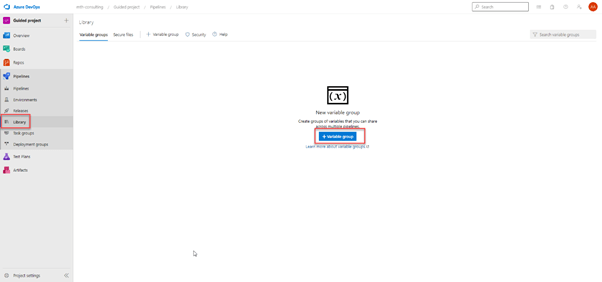
In my release pipeline I will use Azure key vault for my secrets so I will need to add those to my project before I can use them. To add them I will click on “Pipelines” and then on “Library”. I will now click “+ variable group” in the middle of the screen.
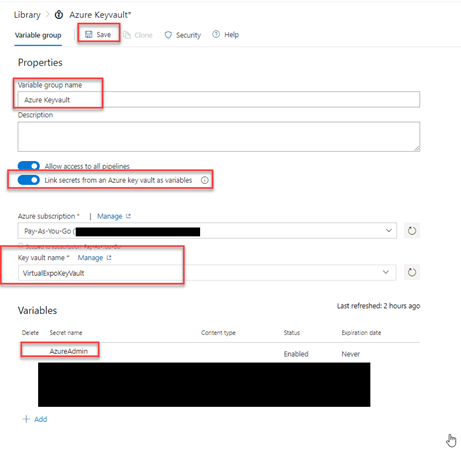
I will name it “Azure keyvault”, move the slider to enable “Link secrets from an Azure key vault as variables”. I will select my subscription and select my key vault name. I can choose which variables I want to use in the project, I will select them all but the important one right now is the “AzureAdmin”. I will click “Save” and I can now move on to creating the release pipeline.
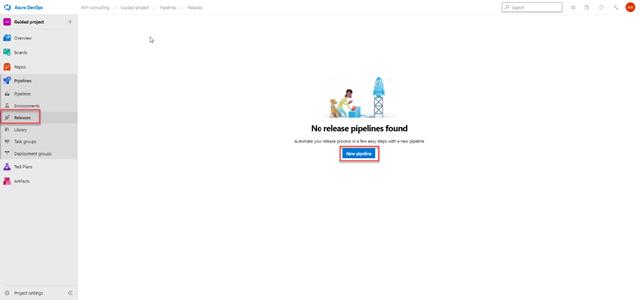
To create my release pipeline I will click on “Pipelines” and then on “Releases”. Here I will click on “New pipeline” in the middle of the screen.
[
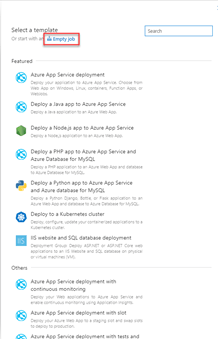
I will click on “Empty job”
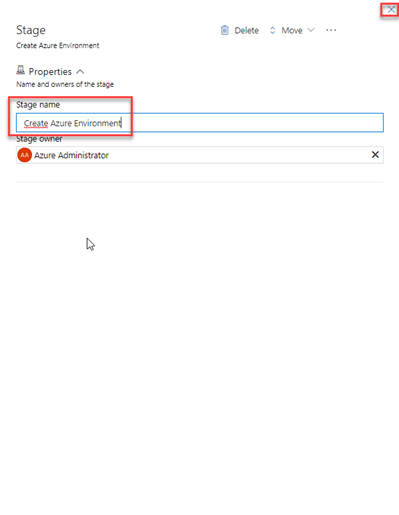
I will name the stage and click the “x” in the top right corner to proceed.
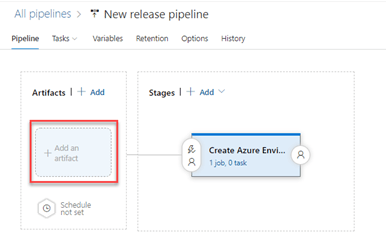
I will the click where it says “Add an artifact”
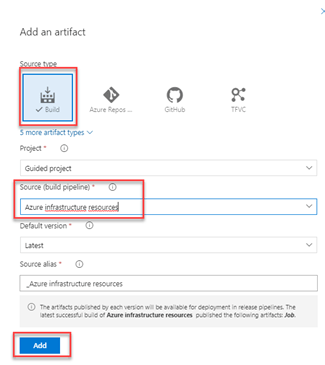
I select the type to “Build” and the choose my project and source as shown in the picture below. I will click “Add” to proceed.
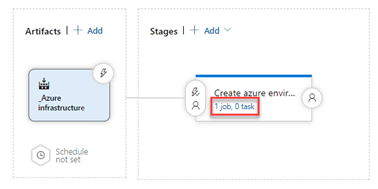
When the artifacts are added I will click on “1 job, 0 task” to add my tasks to the stage.
I will leave the agent job as is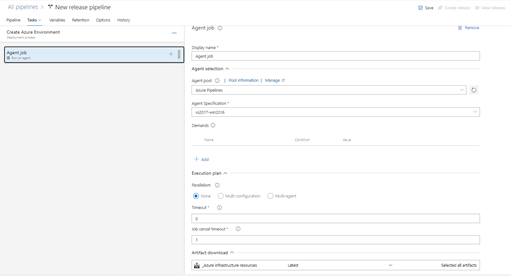
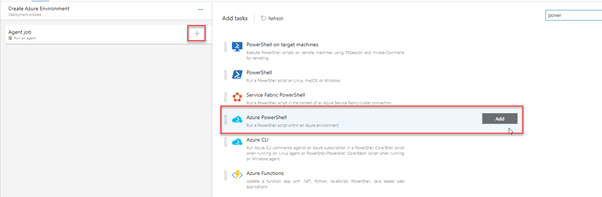
I will click on the “+” sign next to the “Agent job” and then I will search for “Azure PowerShell” and click on “Add”.
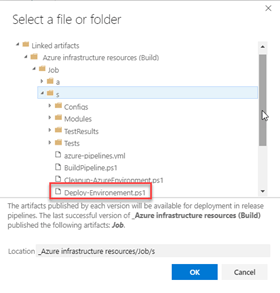
I will select my Azure subscription and then I can click on the “…” to browse for my deployment script. The browsing is shown just below the picture below. The script arguments are very important and you need to make sure that the paths are correct. As you can see I needed to use ” ” for my arguments because I have spaces in the path. I will use the latest PowerShell version. When ready I will click save in the top right corner.
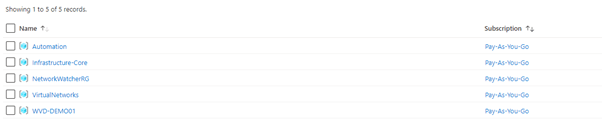
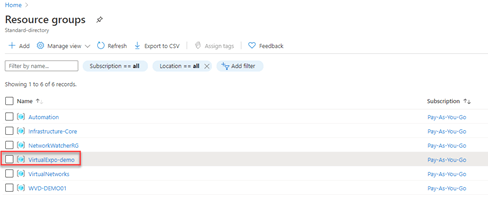
My pipeline is now created, and I am ready to create a release. Before I do that, I want to show you my resource groups in Azure so that you can see what I am creating with my pipeline. The picture below shows what I currently have in my Azure subscription.
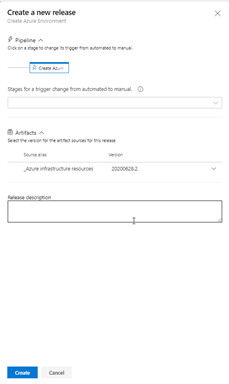
I will go to my release pipelines and then click on “Create release” in the top right corner.

If I wanted to have any manual approvals in the flow I can select the stages for that. In my case I just want to run the release to provisioning my new domain and servers in my Azure subscription. I will click on “Create” to start the release.
I can view the progress of my pipeline by click on it in the list. As you can see below the deployment is executing my deployment script.
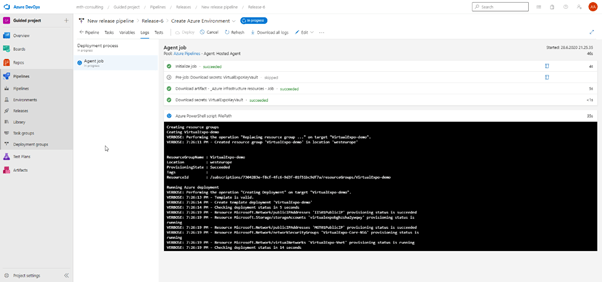
One of the first things that hjappens is that the resource group will be created. On the picture below you can see that the resource group “VirtualExpo-demo” is created.
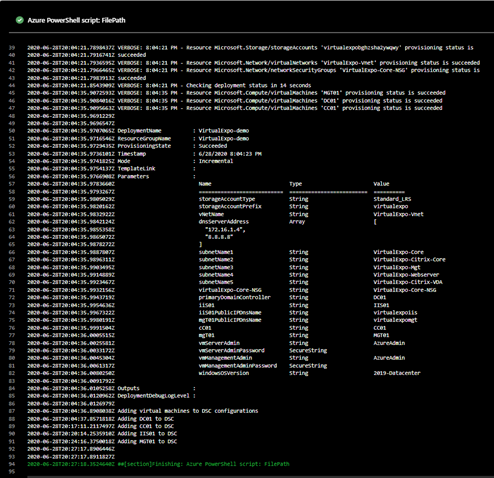
When the deployment is done it will look similar to the picture below. You can see that I have deployed 4 virtual machines and added them to my DSC configurations. I also created the virtual network, the network security group and some rules for the network security group.
I have now shown you how to use Azure DevOps for the deployment of resources to Azure using only code. If I want to change or add resources in my environment, I do that in my code, and that automatically creates a new release. Since I am using the Microsoft ARM templates to deploy these changes, Azure knows if the resources need to be redeployed or if it is just a change. For instance, if I want to add a new rule to my NSG, I add that code, and this is a simple addition to the NSG, and the rest of my resources won’t be affected by running this new release.
I hope that this guide has helped you to understand how I use Azure DevOps for my source control and deployments into Azure. I need to point out that these deployments can be anywhere, you can deploy to on-premises environments as well as any public cloud provided that has an API for creating resources, which should be just about all the public cloud providers.
If you have any tips and tricks for me to improve what I have shown in this series, please reach out to me so I can both learn something new and update this series to reflect these tips and tricks.
Have a great day
Martin