In this last part of the blog series, I will create a virtual machine and install the Citrix Cloud Connector software on this machine. It is important that the VM can reach the domain and join it since a Citrix Cloud Connector has to be domain joined before it will install. In my case, here I have the VPN up and running and using my on-premises active directory as the domain to join.
The first component I need to create the network interface for the VM. I am not allowing any access from the internet to this VM, so I will only need to have a NIC with an internal IP address. To create the NIC, I need the “azurerm_network_interface” resource from Terraform, and the code I use is shown below.
resource "azurerm_network_interface" "CC1-NIC" {
  name                = "CC1-NIC"
  location            = var.Location
  resource_group_name = var.ResourceGroups.SpokeCitrixCore

  ip_configuration {
    name                          = "internal"
    subnet_id                     = module.SpokevNet.vnet_subnets[2]
    private_ip_address_allocation = "Dynamic"
  }
  depends_on = [azurerm_virtual_network_peering.Spoke-2-Hub-Peering]
}
Now I have the NIC created, and I am ready to create the VM that will use the NIC. The VM uses the “azurerm_windows_virtual_machine” resource from Terraform. In the code, I need to define some names and resource group, but also pretty important to notice I define the OS disk type, the image type (Windows 2019 Datacenter in my case here), and I use depends_on again to ensure that any prerequisites are in place before creating the VM.
resource "azurerm_windows_virtual_machine" "CC1" {
  name                = var.CloudConnectors.CC1Name
  computer_name       = var.CloudConnectors.CC1Name
  location            = var.Location
  resource_group_name = var.ResourceGroups.SpokeCitrixCore
  size                = var.CloudConnectors.VMSize
  admin_username      = var.CloudConnectors.VMUserName
  admin_password      = var.CloudConnectors.VMPassword
  network_interface_ids = [
    azurerm_network_interface.CC1-NIC.id,
  ]

  os_disk {
    caching              = "ReadWrite"
    storage_account_type = "Standard_LRS"
  }

  source_image_reference {
    publisher = var.CloudConnectors.VMPublisher
    offer     = var.CloudConnectors.VMOffer
    sku       = var.CloudConnectors.VMSKU
    version   = var.CloudConnectors.VMversion
  }
  depends_on = [azurerm_virtual_network_peering.Spoke-2-Hub-Peering]
}
Now I have my code for the VM ready, but I still need to create the code for domain doing and software installation. I use a resource called “azurerm_virtual_machine_extension” to solve these last steps where I specify the type as “JsonADDomainExtension”. I put in the values with variables so that I only need to change those in my code if the domain name or join account changes. When I have joined the VM to the domain, I use a provisioner called “local-exec” which runs a command on the machine I execute the terraform commands on, which code block use Azure CLI to run a PowerShell script inside the VM. This script will install the Citrix Cloud Connector. The code I use to execute the domain join and script execution is shown below.
resource "azurerm_virtual_machine_extension" "join-domain" {
  name                 = "join-domain"
  virtual_machine_id   = azurerm_windows_virtual_machine.CC1.id
  publisher            = "Microsoft.Compute"
  type                 = "JsonADDomainExtension"
  type_handler_version = "1.3"

  # NOTE: the `OUPath` field is intentionally blank, to put it in the Computers OU
  settings = <<SETTINGS
    {
        "Name": "${var.CloudConnectors.DomainName}",
        "OUPath": "",
        "User": "${var.CloudConnectors.DomainName}${var.CloudConnectors.DomainJoinUser}",
        "Restart": "true",
        "Options": "3"
    }
SETTINGS

  protected_settings = <<SETTINGS
    {
        "Password": "${var.CloudConnectors.DomainJoinPassword}"
    }
SETTINGS
  provisioner "local-exec" {
    command = "az vm run-command invoke --command-id RunPowerShellScript --name ${var.CloudConnectors.CC1Name} -g ${var.ResourceGroups.SpokeCitrixCore} --scripts @InstallCloudConnector.ps1 --parameters APIID=${var.CloudConnectors.APIID} APIKey=${var.CloudConnectors.APIKey} CustomerName=${var.CloudConnectors.CustomerName}"
  }
}
The script that installs the Citrix Cloud Connector software will download the software from the Citrix Cloud portal. Before I run this script, I need to create an API client ID and secret in the Citrix Cloud portal, and I need to know my customer name. I have put all this information into my variables file so that my code is nice and clean. Using the variables file, I also make it easier to switch to a secret stored in Azure Key Vault. The script for installing Citrix Cloud Connector software is shown below.
[CmdletBinding(SupportsShouldProcess=$True)]
param(
    $APIID,
    $APIKey,
    $CustomerName

)
$FileName = "cwcconnector.exe"
$Path = "C:Temp"
$UnattendedArgs = "/q /Customer:$CustomerName /ClientID:$APIID /ClientSecret:$APIKey /AcceptTermsOfService:true"
$url = "https://downloads.cloud.com/$CustomerName/connector/cwcconnector.exe"

Write-Verbose "Downloading $Vendor $Product $Version" -Verbose
New-Item -Path $Path -ItemType Directory -Force
Invoke-WebRequest -Uri $url -OutFile $Path$FileName

$ExitCode = (Start-Process "$Path$FileName" $UnattendedArgs -Wait -Passthru).ExitCode
Return $ExitCode
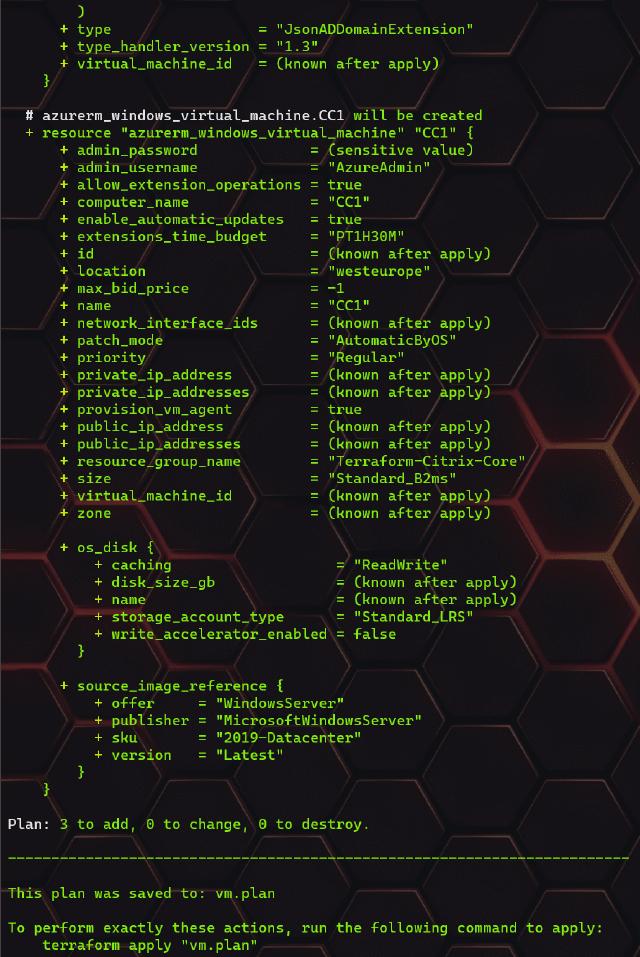
Now I have completed my code, so I need to run my Terraform plan command. When I run the command, I can see that three resources will be added, and none will be changed or destroyed.
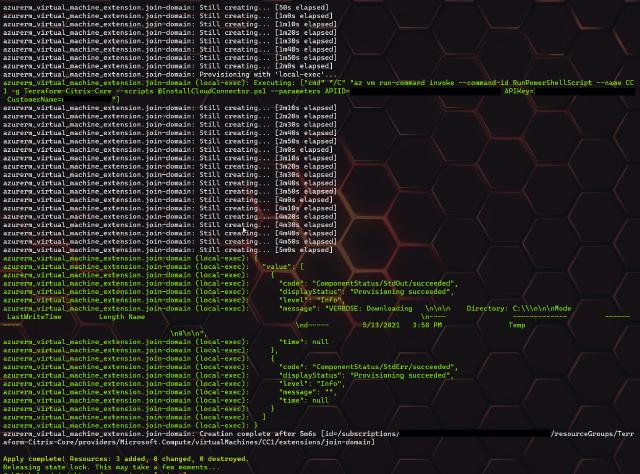
I am happy about that status, so now I will run the “terraform apply “vm.plan” to deploy my virtual machine, join it to my domain and install the Citrix Cloud Connector software on it.
The deployment status looks good, so now I can check if the Citrix Cloud Connector is also showing up in my Citrix Cloud portal. As the picture below shows, the installation was successful, and my cloud connector is only and ready to serve its purpose.
This is the end of my getting started with Azure and Terraform guide. I hope it is useful and helps get you started on this infrastructure as code adventure. If you have any suggestions for a new guide or corrections to this one, please reach out to me on Twitter or here on the page.


