In part 1 of the series, I got my GitHub repository set up with a secret containing a service principal for Azure. This setup allows me to create a GitHub actions deployment using the service principal as authentication.
In this part, I create the GitHub action to create a resource group in my Azure subscription. GitHub actions are using the YAML format, and for me, this took a bit to get used to, not because it is hard to read and write, but because the indentation is important and coming from PowerShell and JSON, this is new to me.
To create an action in GitHub, I click on the “Actions” tab under my repository. It is possible to use a template provided by GitHub, but I choose to start my own by clicking “Skip this and set up a workflow yourself”.
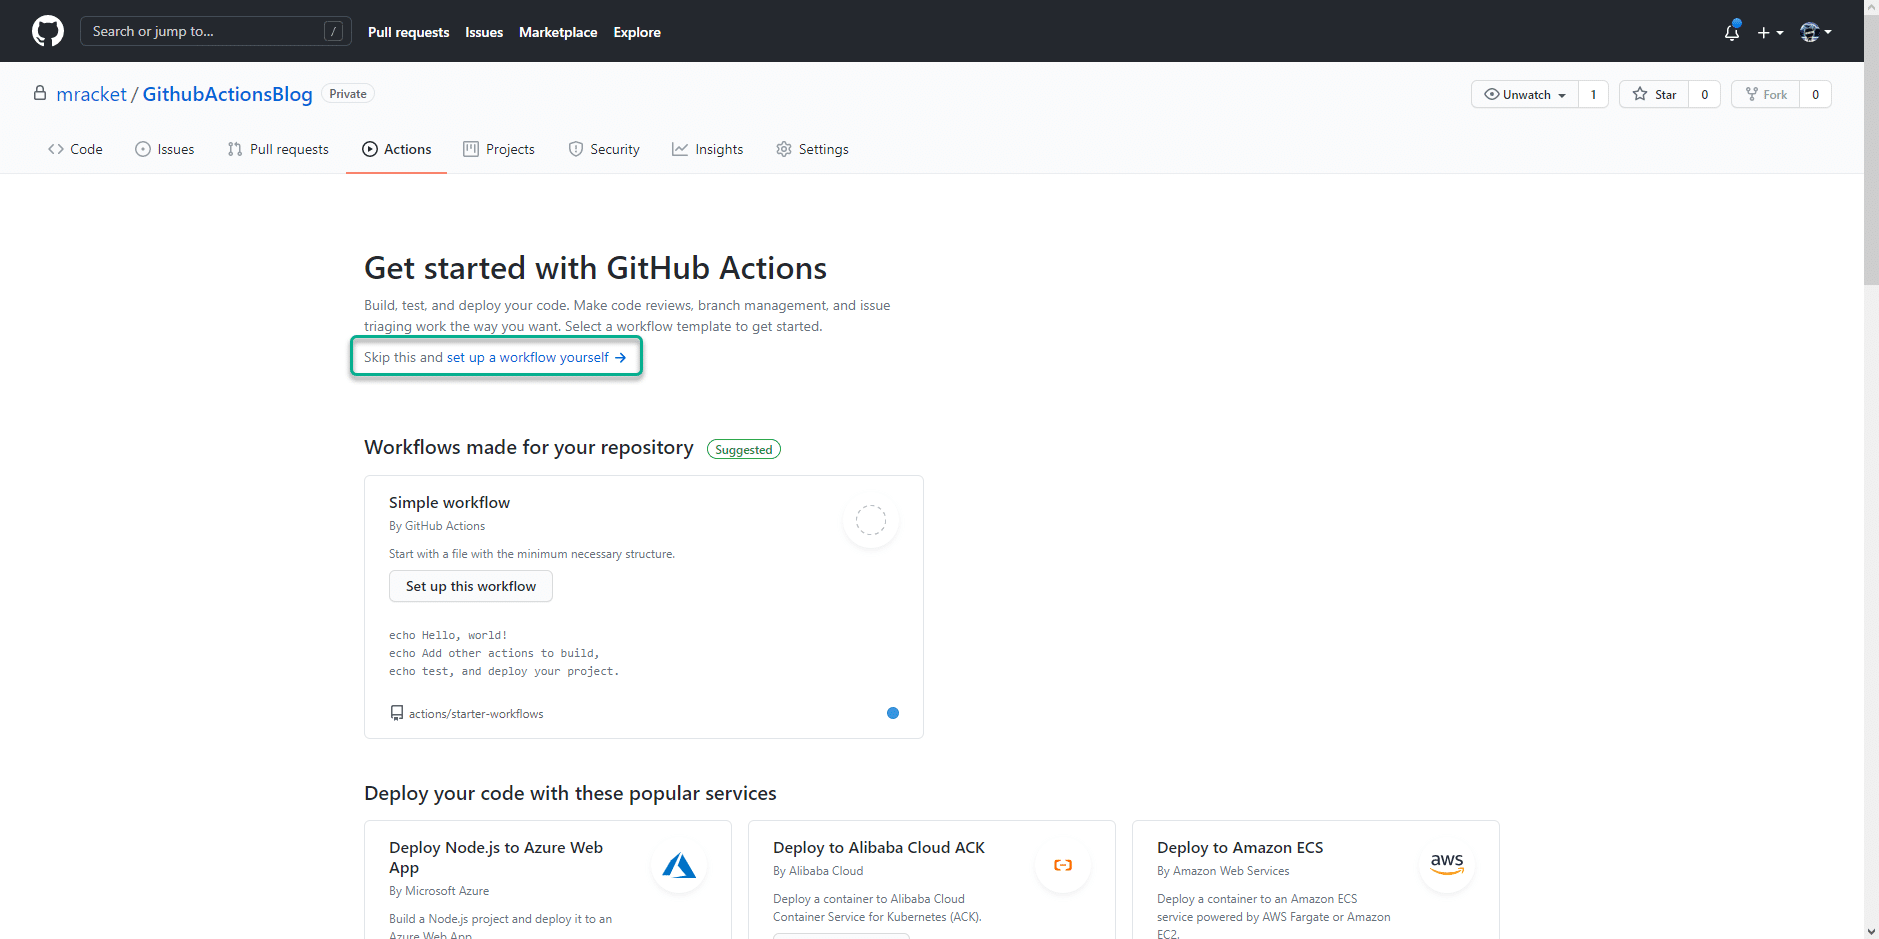
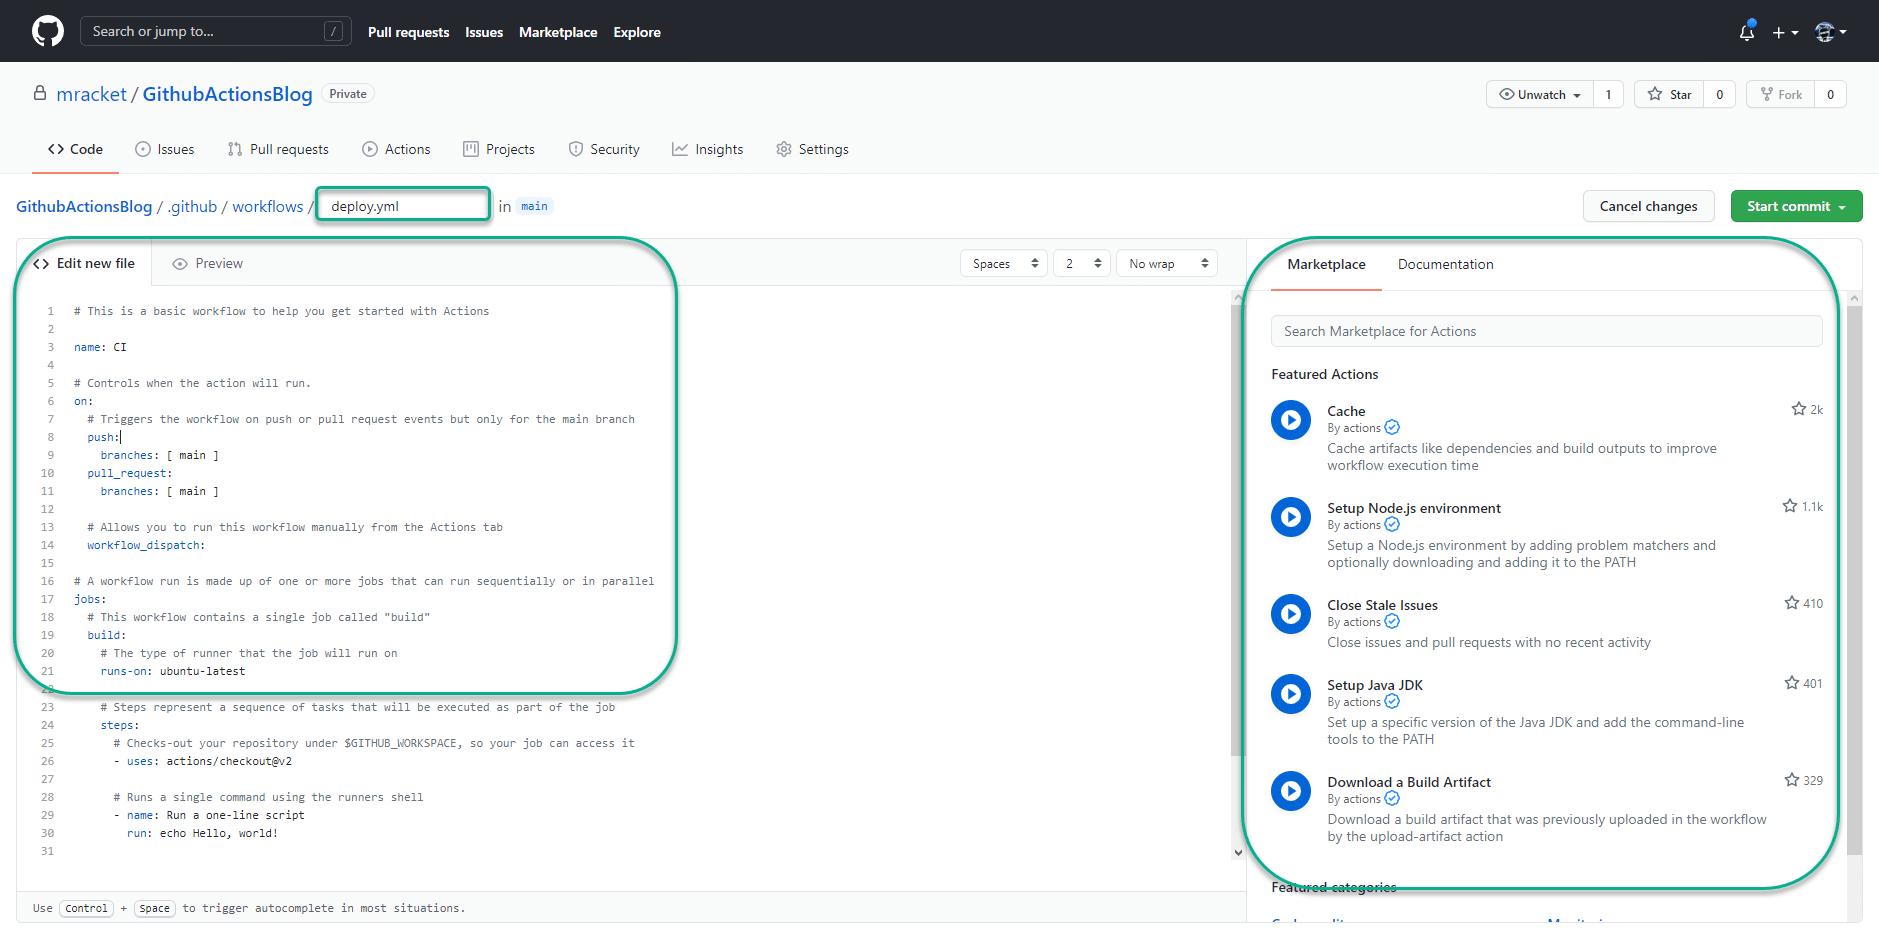
GitHub delivers the structure to create the action and with some samples set up already. On the picture below I have highlighted the name section where I call my action “deploy.yml”. I also highlighted a section in the code when it is shown the action is using continuous integration (CI) and that it will execute on push to the main branch and pull request to the main branch. Most of the remaining code will be deleted since it is not what I want to use. The last section I have highlighted is the marketplace, where I can search for snippets and integrations with an external system. I will get a bit more into that later in this post. For now, I will click on “Start commit” and “Commit new file”.
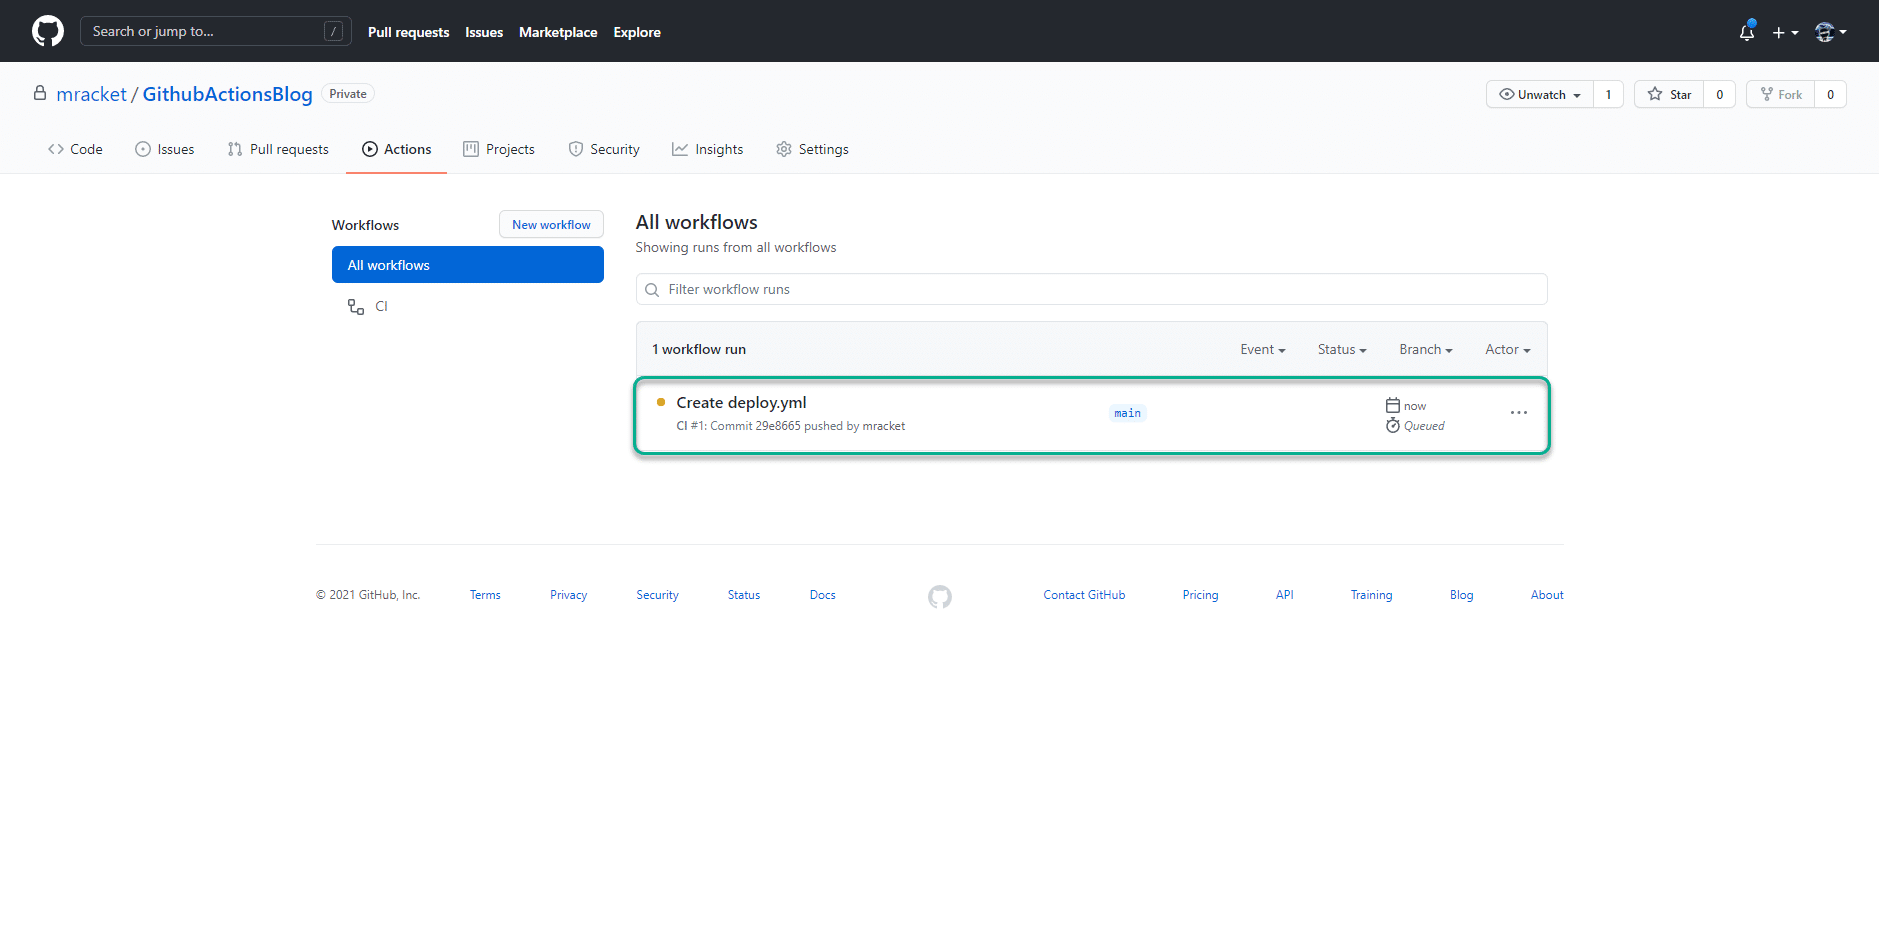
I click on “Actions” again, and I can now see that my commit is completed with success, and this is the action that has been kicked off. This means that the YAML files I build are running on a “GitHub runner”, in this case, a Ubuntu runner, as it was stated in the YAML file.
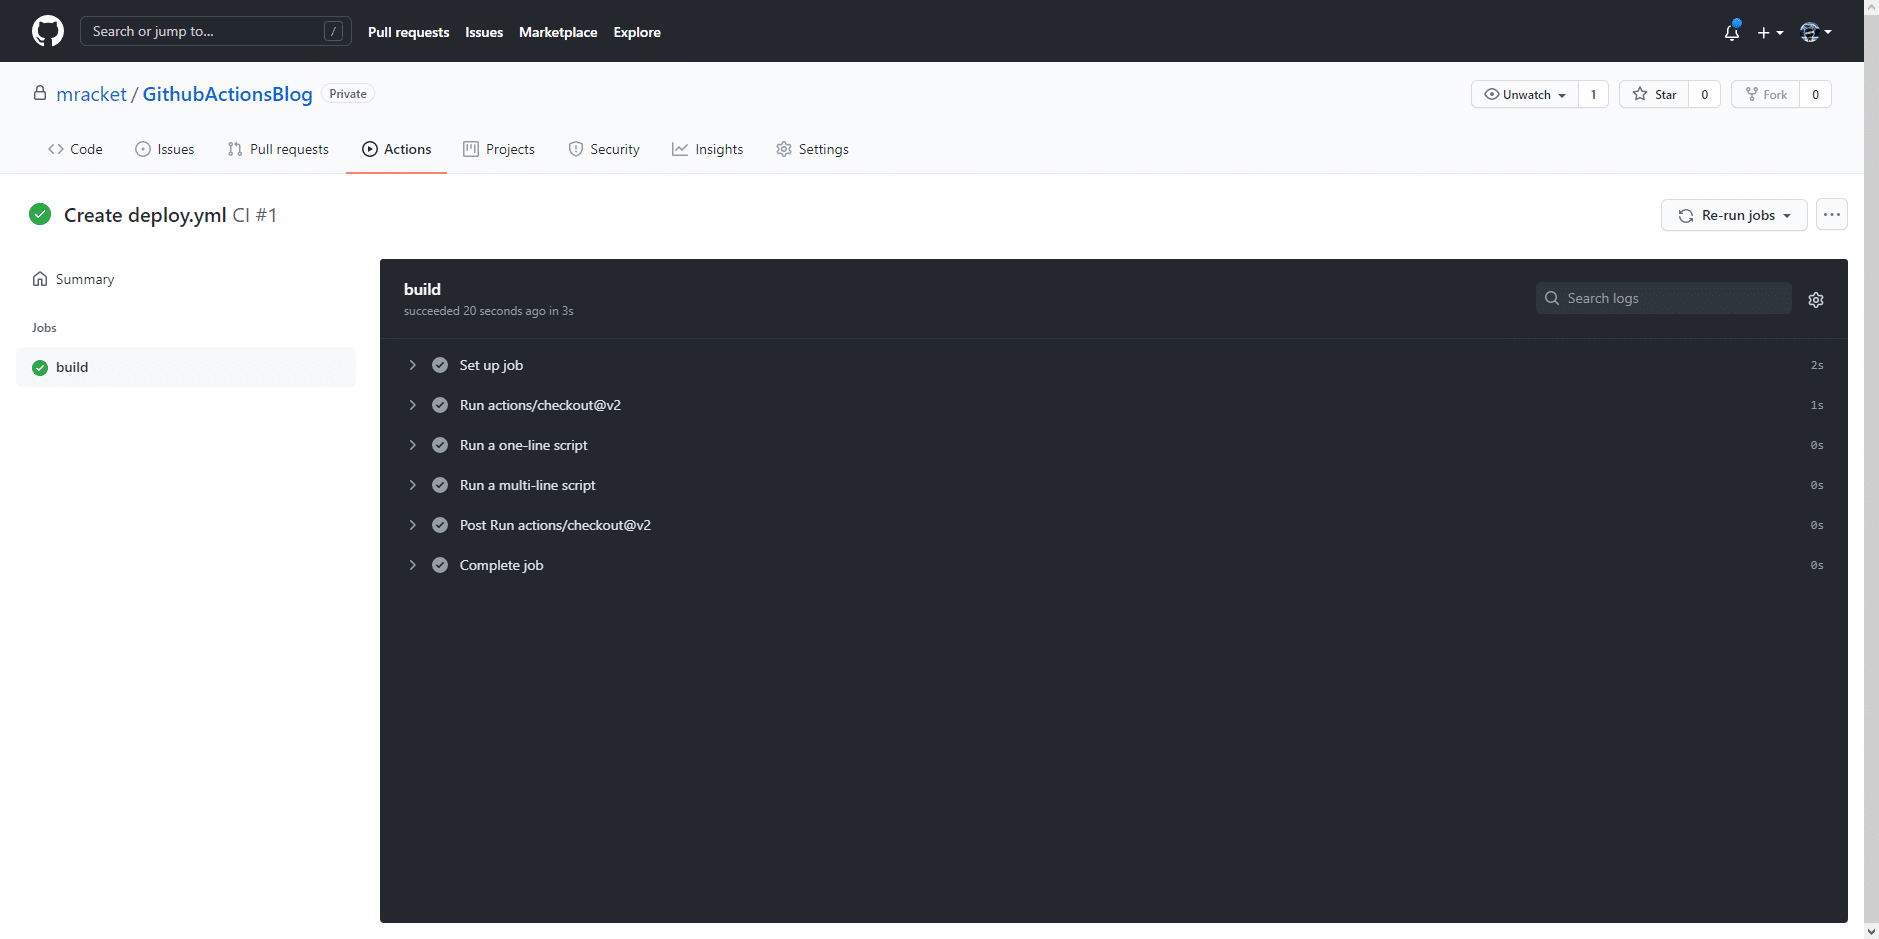
If I open the action that has run, I can see the status of each task listed in the yam file. This will look like the picture below. For now, I won’t go into what has actually run since it is not the task I want to use for my actual deployment.
Now I have my action all up and running, but I want to create a resource group in my Azure subscription. I will need a bit of Bicep code for this, and I have pasted that below. The code creates a resource group in the West Europe location. I will save this file as ResourceGroup.bicep under a subfolder called ResourceGroup and commit that to my repository.
param location string = 'WestEurope'
targetScope = 'subscription'

resource resourcegroups 'Microsoft.Resources/resourceGroups@2021-01-01' = {
  location: location
  name: 'rg-bicep-001'
}

With the code in place, I can now edit my actions to use this bicep file to create my resource group. To do this, I use VS Code to edit the deploy.yml file. As you can see below, the file is located in the “.github/workflows” folder.
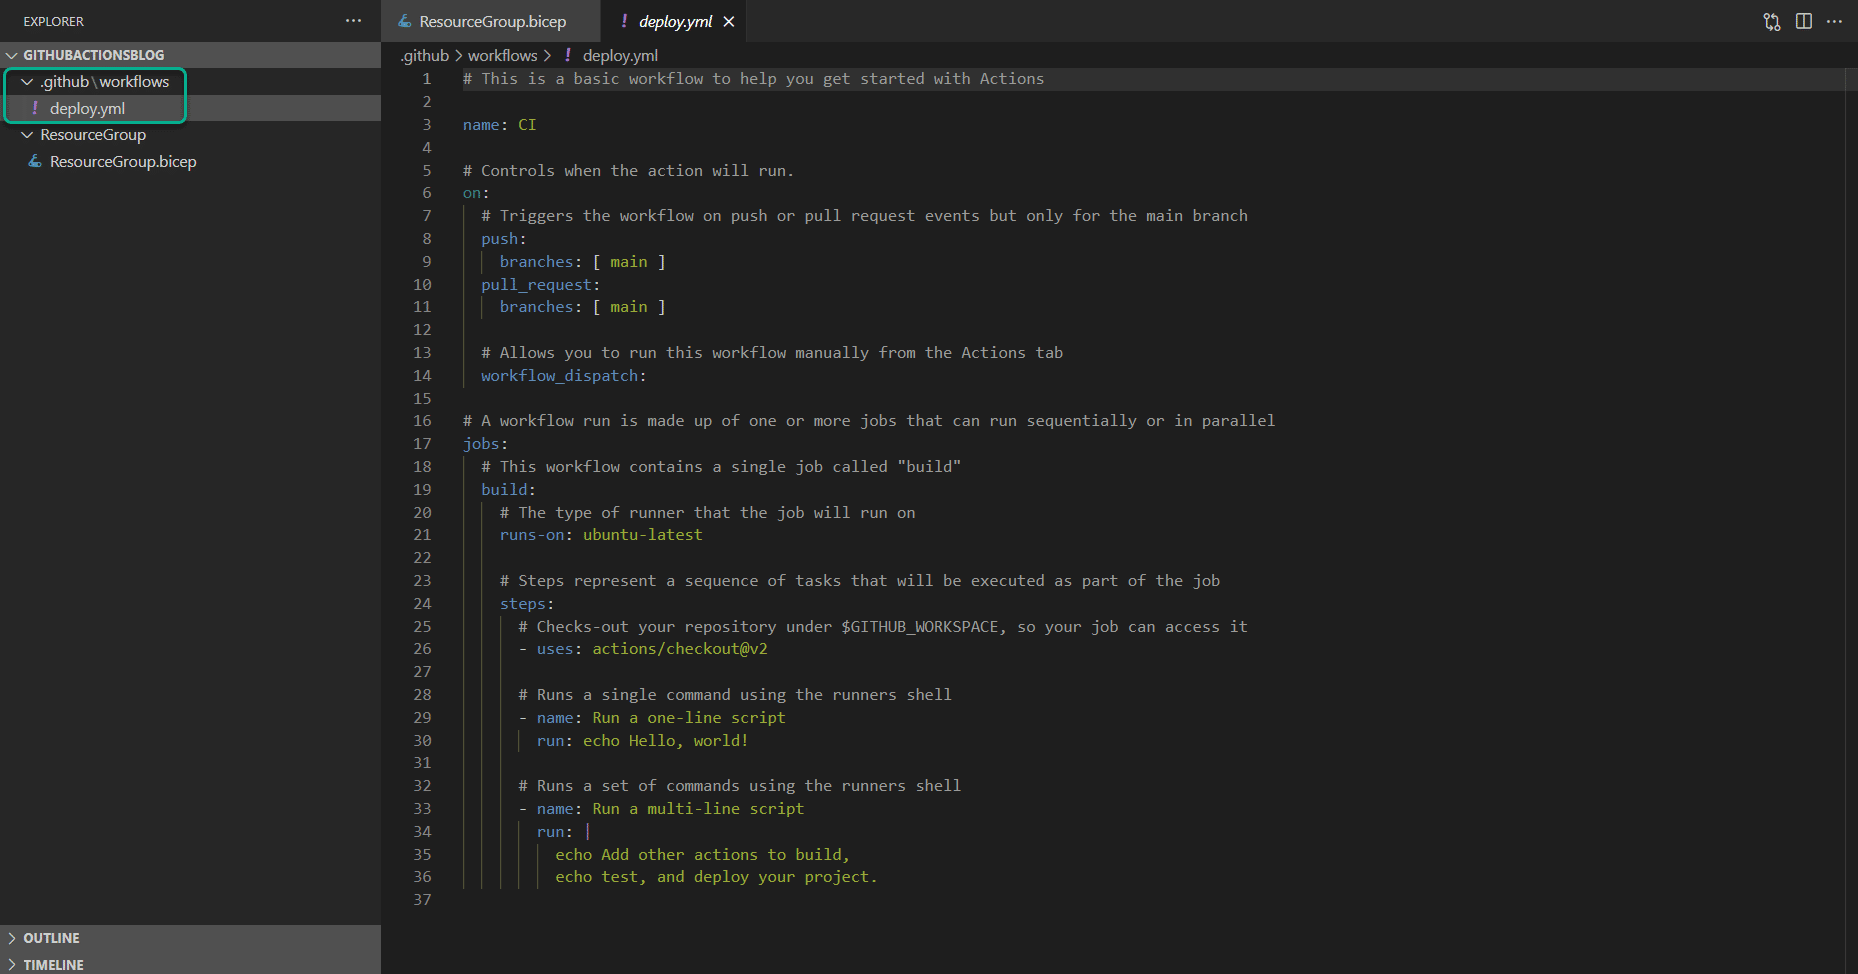
In the code below, I have removed some of the lines that GitHub provided in the action, and I have added the lines to log in to Azure and run the deployment of my bicep file.
name: CI

# Controls when the action will run.
on:
  # Triggers the workflow on push or pull request events but only for the main branch
  push:
    branches: [ main ]
  pull_request:
    branches: [ main ]

  # Allows you to run this workflow manually from the Actions tab
  workflow_dispatch:

# A workflow run is made up of one or more jobs that can run sequentially or in parallel
jobs:
  build-and-deploy:
    runs-on: ubuntu-latest
    steps:
    - uses: actions/checkout@master
    - uses: azure/login@v1
      with:
        creds: ${{ secrets.AZURE_CREDENTIALS_BLOGSERIES }}
    - uses: azure/arm-deploy@main
      with:
        scope: subscription
        subscriptionId: ${{ secrets.AZURE_SUBSCRIPTION }}
        region: westeurope
        template: ./ResourceGroup/ResourceGroup.bicep
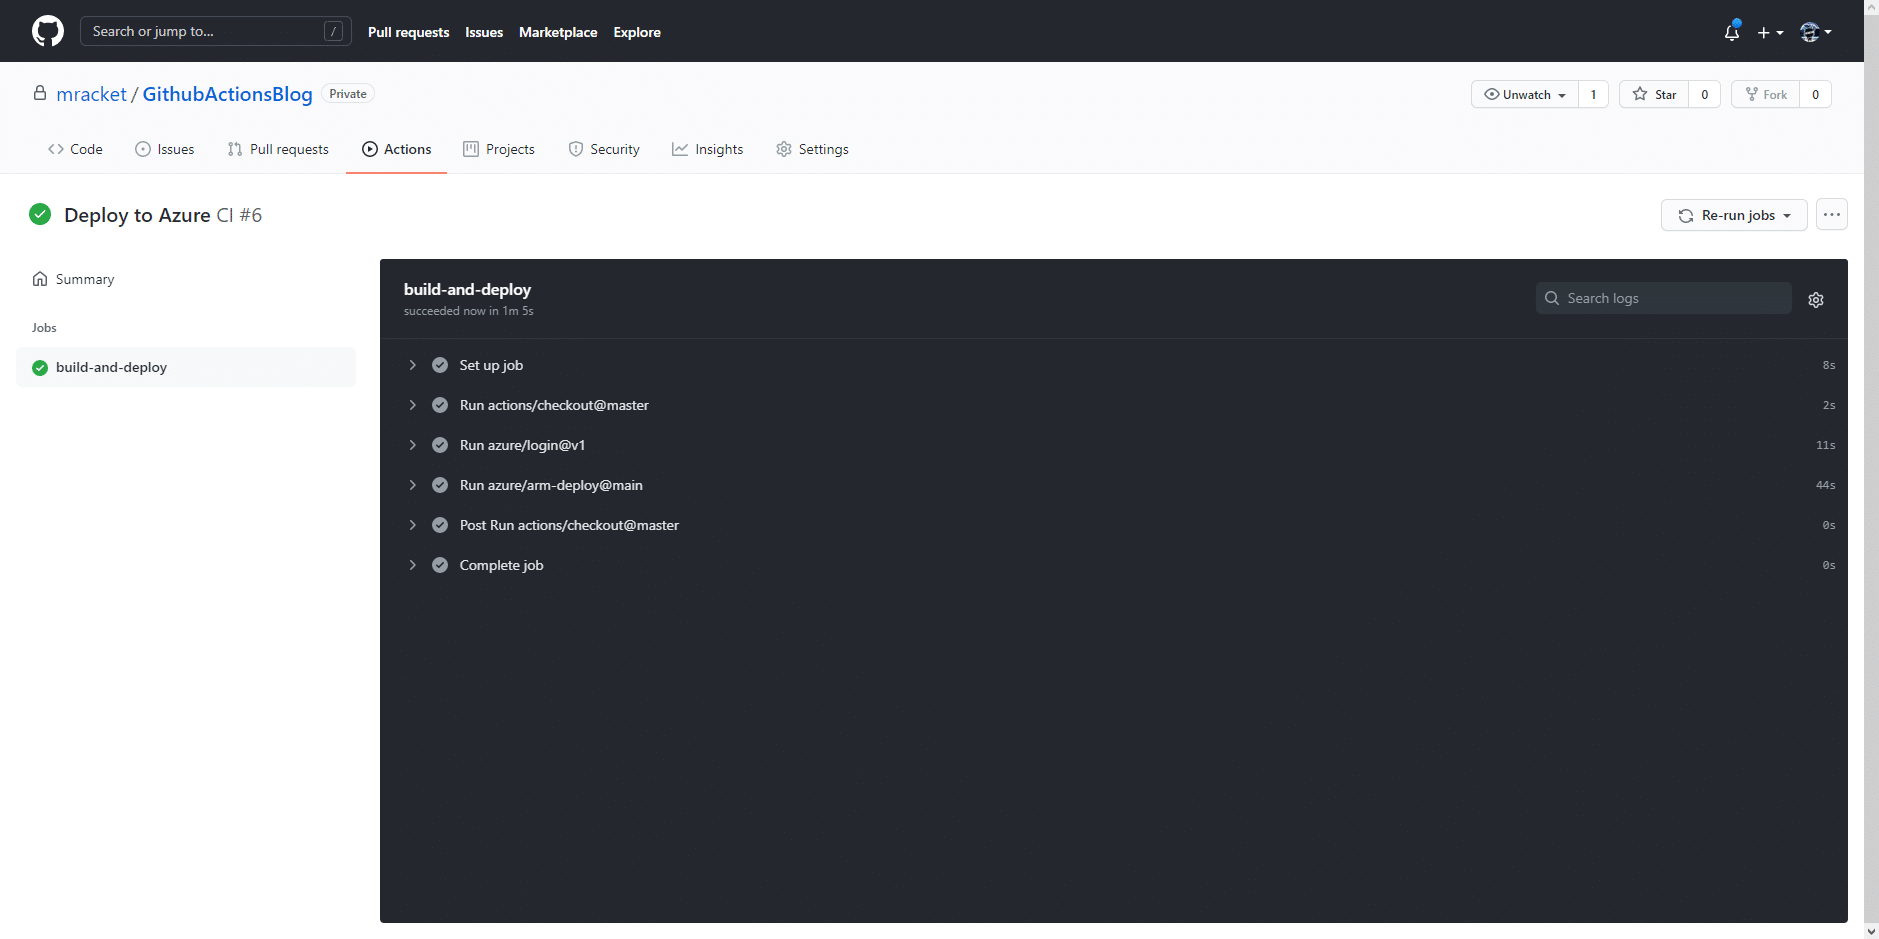
I will save the updates and commit my changes to the repository. Next, I can open the actions tab on the GitHub page to view the deployment state of my new changes. The picture below shows that the deployment went fine and that my resources should be deployed as expected.
I can now check the Azure portal to see if my new resource group is in fact deployed to my subscription.

The portal shows my new resource group just fine, and if I check the deployment log on the Azure subscription, I can also see that the deployment ran successfully.

I am now able to deploy Azure resources from GitHub Actions using Bicep code. This is the foundation of this blog series, so with that sorted out, I can now focus on building my Bicep code to deploy the remaining resources, and I will do just that in the following parts of the blog series.
Stay tuned and do provide feedback if you have any.