Intro
In this post, I will guide you through creating an Azure Virtual Network Manager preview (VNM) and describe what the service can do for you. The service is still in preview when writing this post, so please do not deploy any of this into your production environment.
VNM will enable central management of connectivity and security policies across regions and subscriptions. What this actually means will be shown in the guide below, but it does bring something new to the table. The VNM adds yet another rule set to the security stack. These rules will override any Network Security Group (NSG) rules you might have already created. I am not really sure I like yet another ruleset. We already have an Azure Firewall and Network Security Group, so adding one more to the mix will make troubleshooting a bit harder.
Let us get into the setup of the VNM and return to the pros and cons in conclusion later on.
Architecture diagram
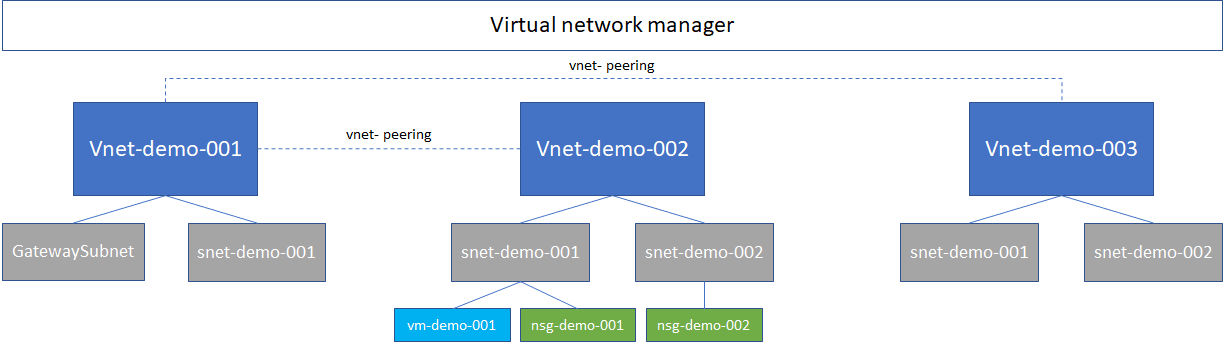
Below is the architecture that I am going to build in this post. I have already created everything besides the VNM, and all resources are just created for this demo. I have three virtual networks (vnets) and some subnets on each vnet. On two subnets, I have created an NSG and one virtual machine to show what the network rules will look like when using NSG and VNM. The diagram does state vnet peerings as well, but I haven’t created them yet. VNM will help with that process.
Virtual Network Manager
First, I need to enable the preview feature on my Azure tenant. I do this by going to the “Preview features” plane and searching for “AllowAzureNetworkManager.” I can then mark the feature and click on “Register.”

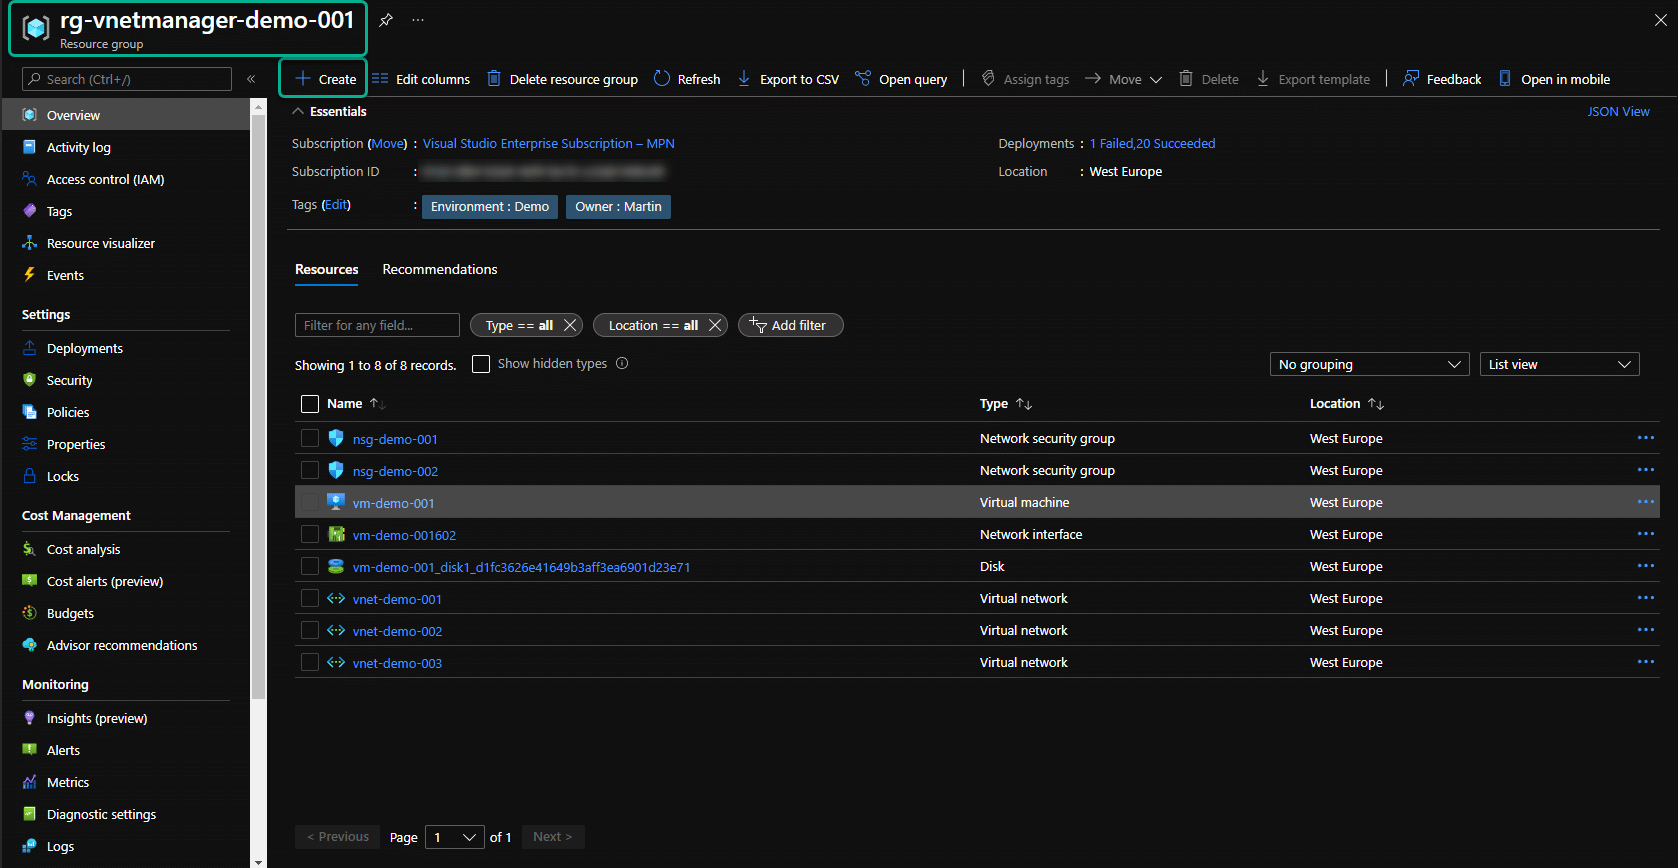
Next, I will create the VNM by going to my resource group (rg-vnetmanager-demo-001) and click “Create.”
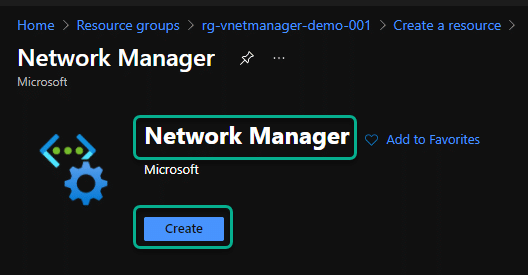
I will search for “Network Manager” and click on “Create.”
I named my instance “vnm-westeurope-001” and chose my subscription to place it in.
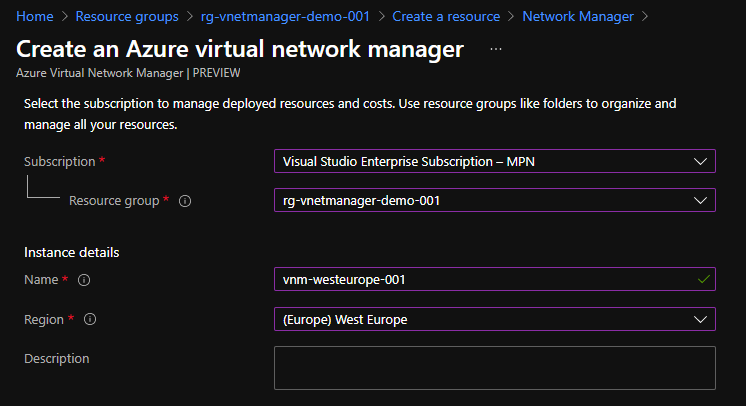
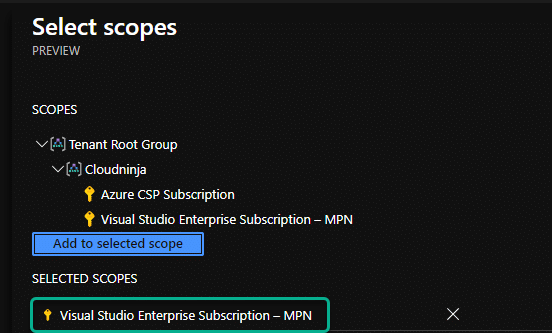
I also have to choose the scope for my VNM. The scope can be either a management group or subscriptions. In this demo, I have selected one subscription, which is my visual studio subscription.
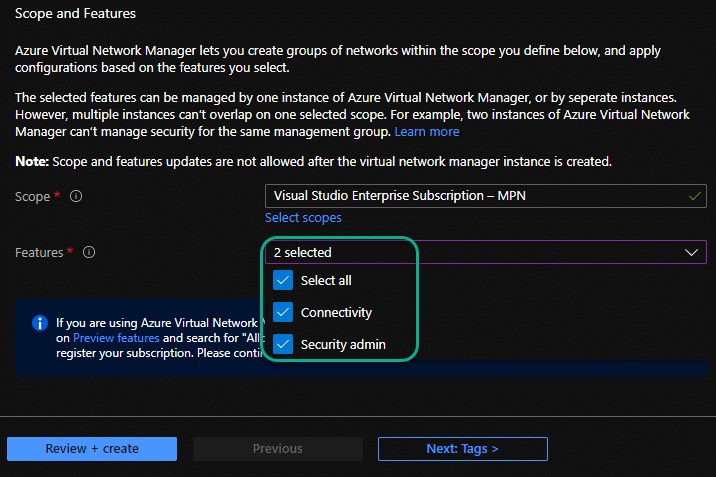
I have selected “Connectivity” and “Security admin” on the features since I want to create peerings and security rules.
I have added tags to match my demo environment, and I can now click on “Create.”

Network groups
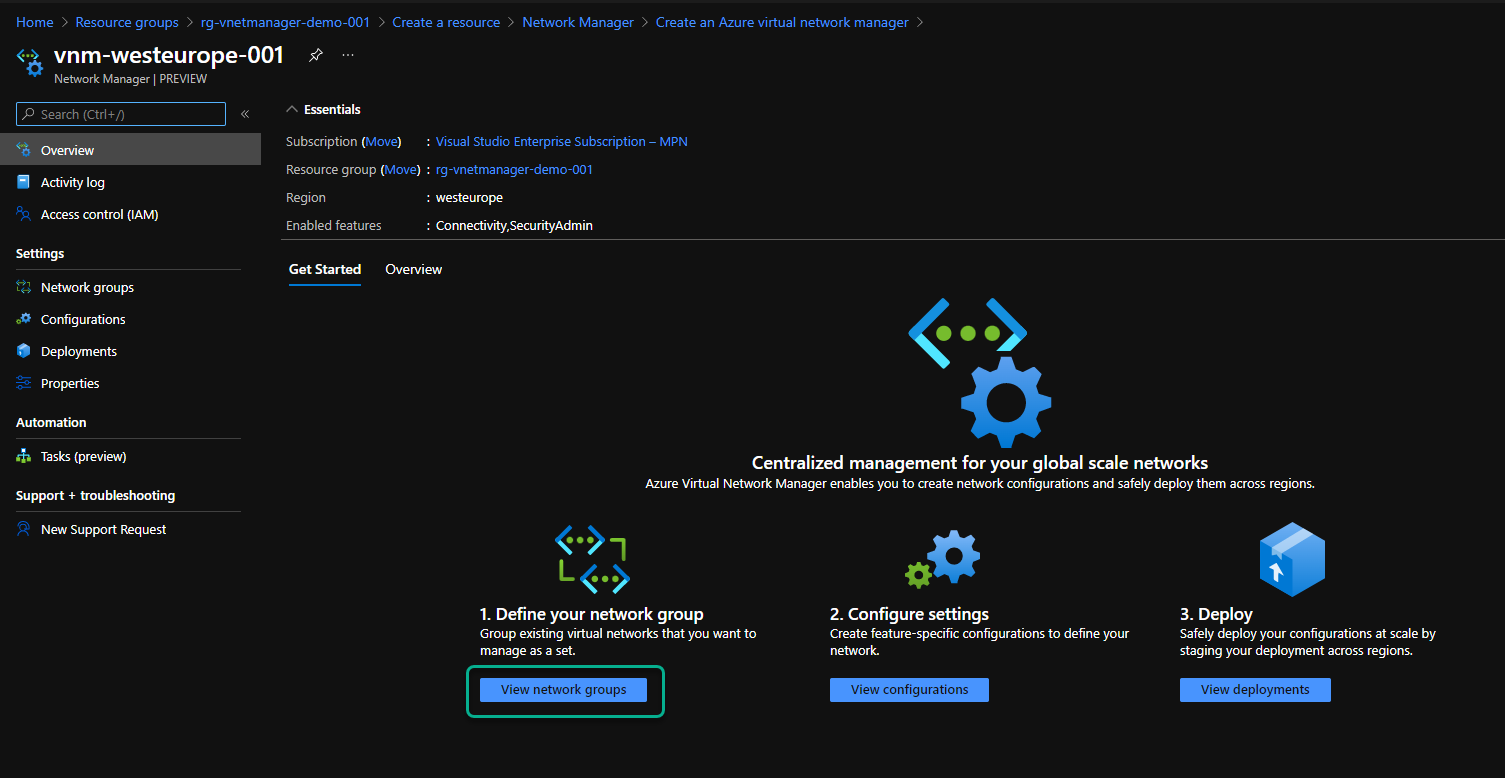
With the VNM created, it is time to create the configuration. I will follow the guide on the overview page and click on “View network groups.”
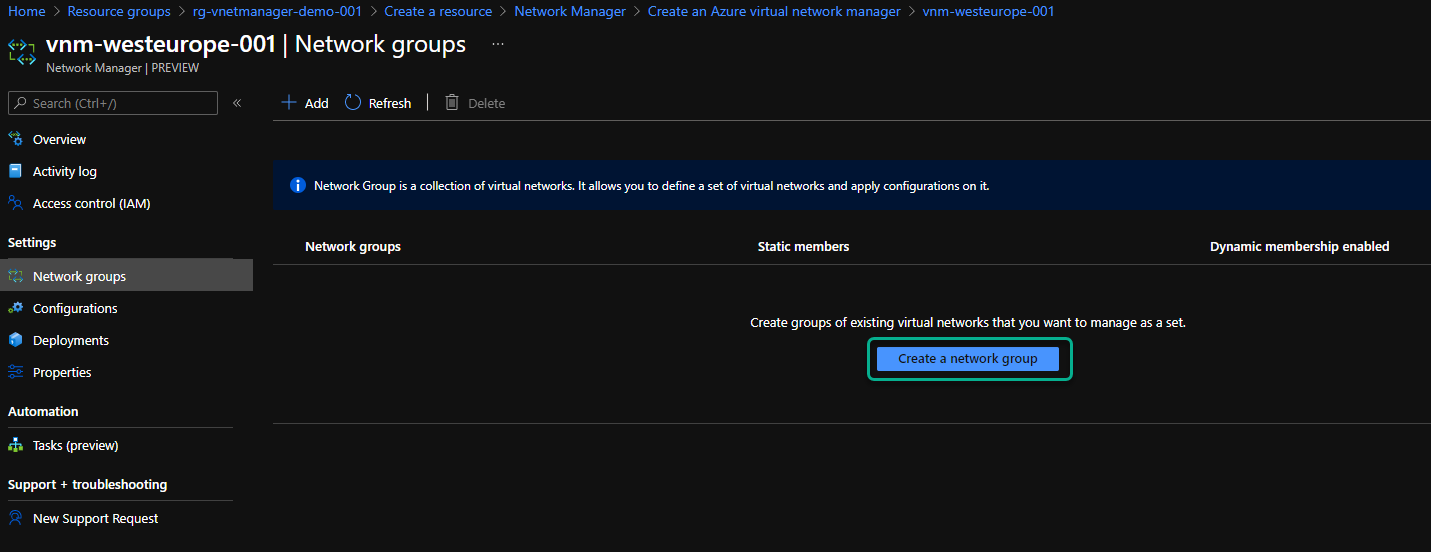
I will click on “Create a network group” and click on “Add” in the top bar.
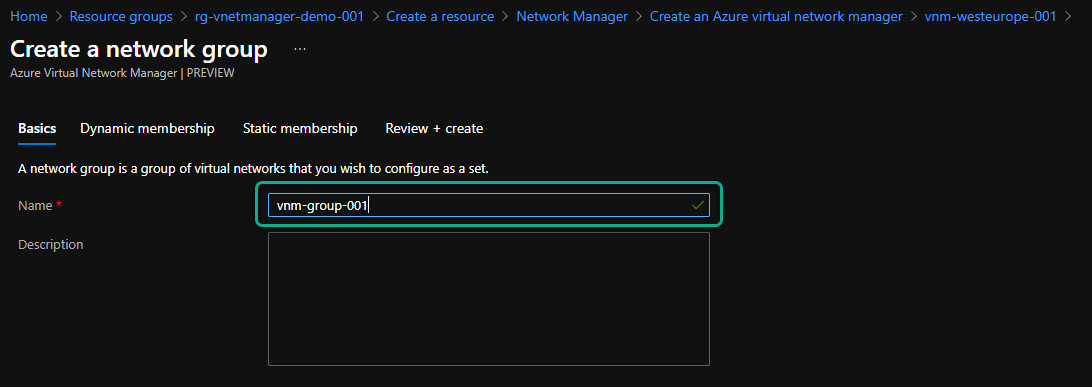
I will name my group “vnm-group-001” and click “Next: Dynamic membership.”
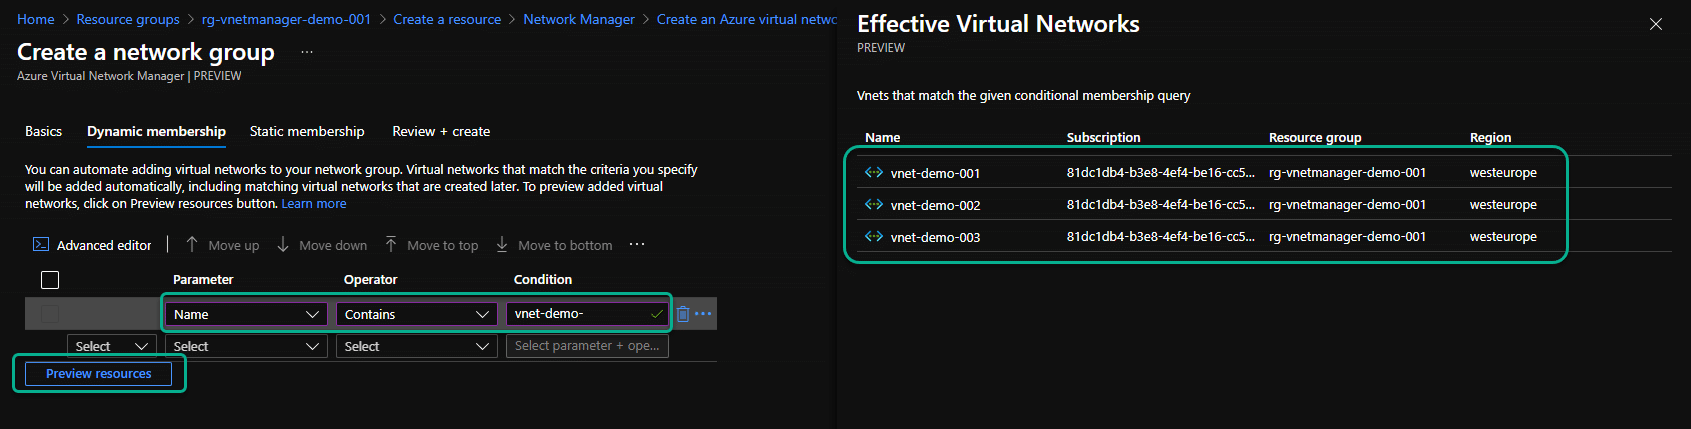
I will use dynamic rules to automatically add any new vnets if they follow my naming convention. I create a rule where the parameter “Name” should contain “vnet-demo-.” I can hit the “Preview resources” to ensure my rule includes the vnets I want and only those.
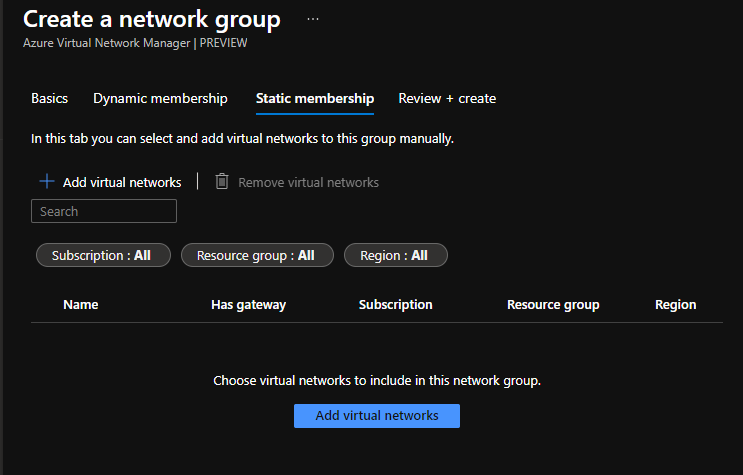
I can also map vnets statically, but I have chosen not to do this for this demo.
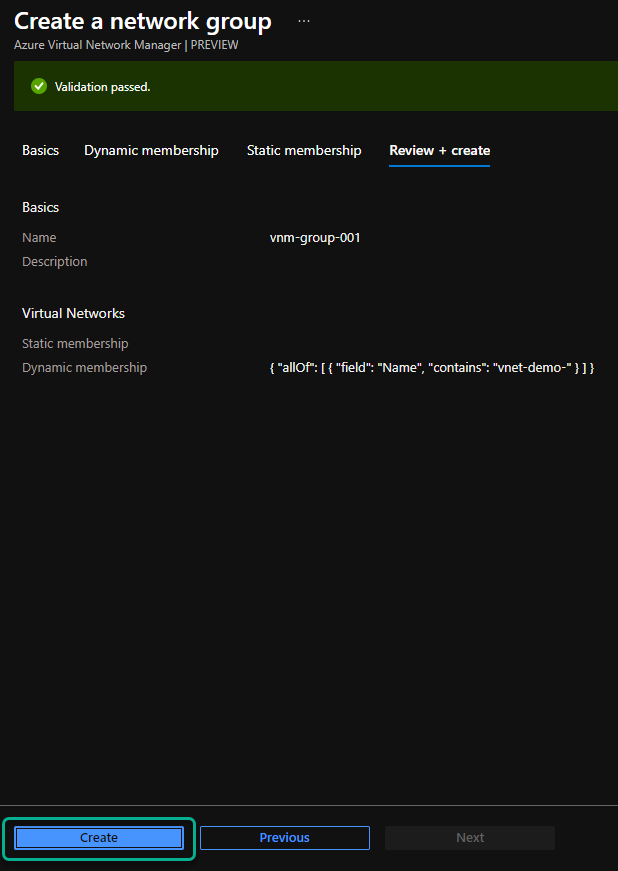
I can now review my group settings and click on “Create” to create the group.
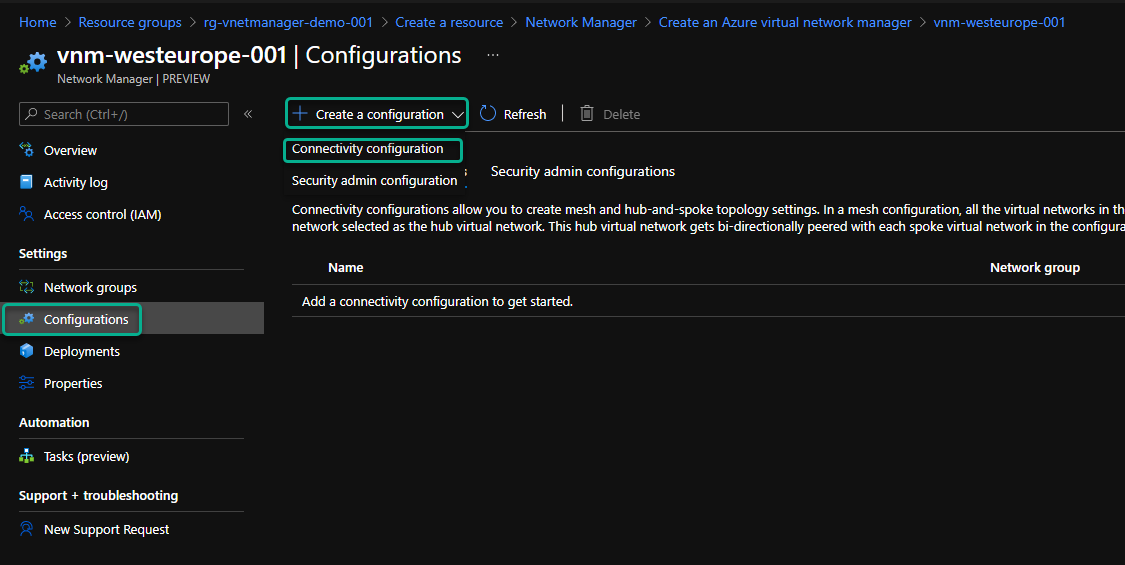
Configurations
I now have my vnets included in the VNM, so time to get the connectivity created between the vnets. I go to the “Configurations” section and click on “Create a configuration,” and select “Connectivity configuration.”
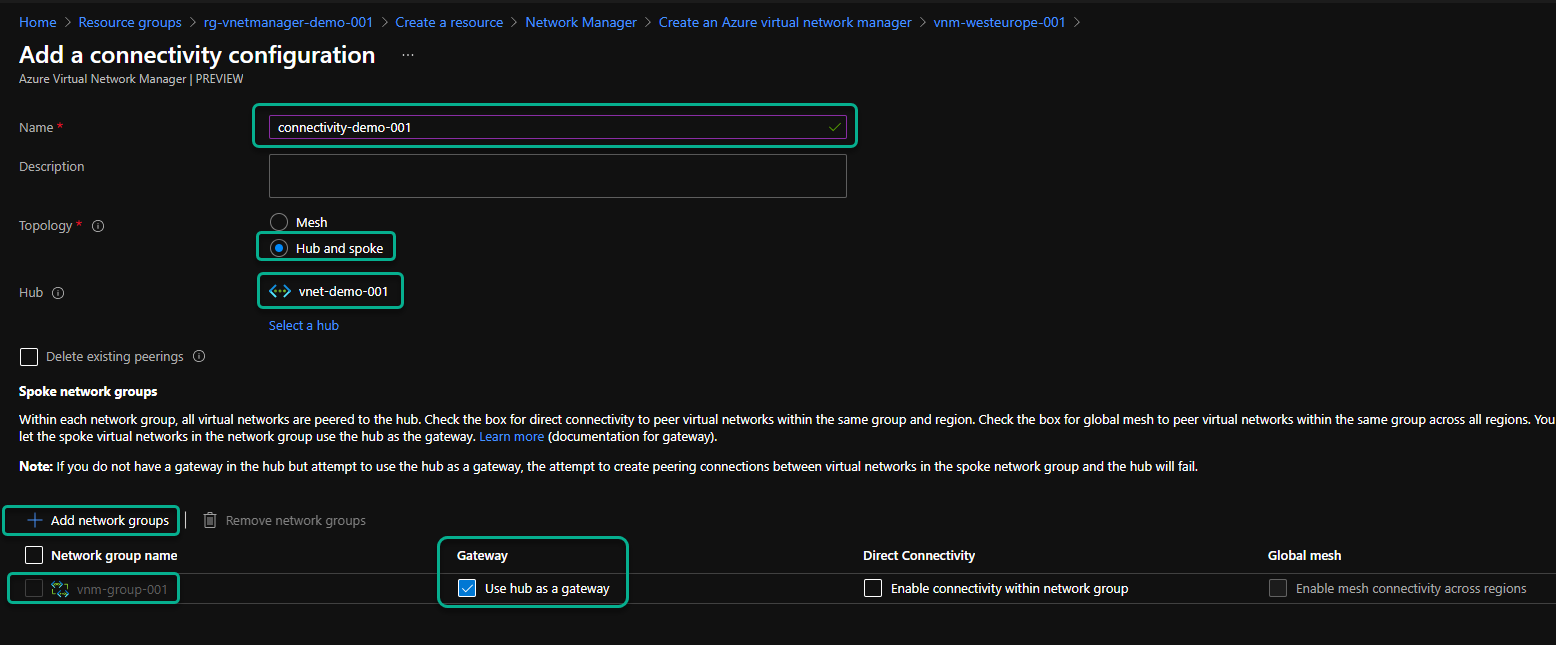
I name the configuration “connectivity-demo-001” and select the “Hub and spoke” topology. If you want all vnets to connect, you can choose the “Mesh” topology, but I prefer the hub and spoke. I select which vnet will be my hub, then add my network group into the configuration. I have marked the “Gateway” to “Use hub as a gateway” to ensure that any traffic to my VPN/express route will go through this hub peering. I click on “Add” to add the configuration. The configuration won’t be deployed by clicking on add. No changes will be executed yet.
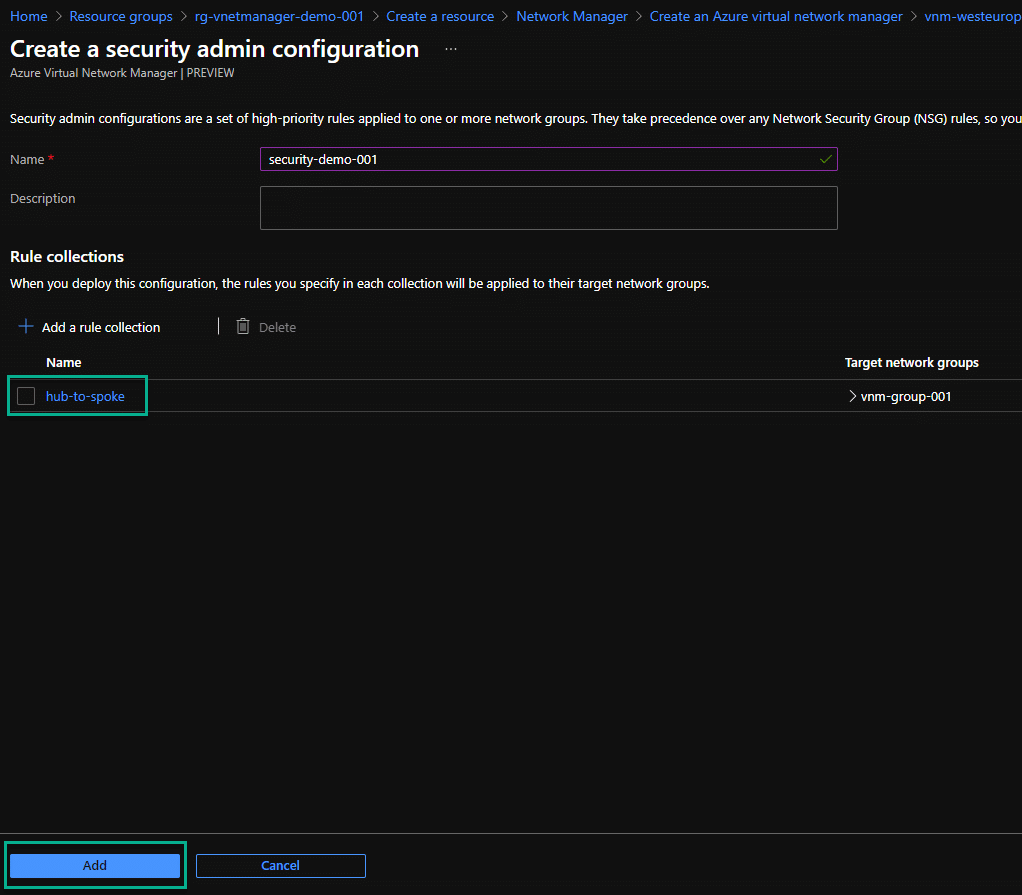
Before I go to deploying my configurations, I want to create a security configuration as well. I do this by clicking on “Create a configuration” and selecting “Security admin configuration.”

I name my configuration “security-demo-001.” Notice that any rules will take precedence over any NSG rules created.

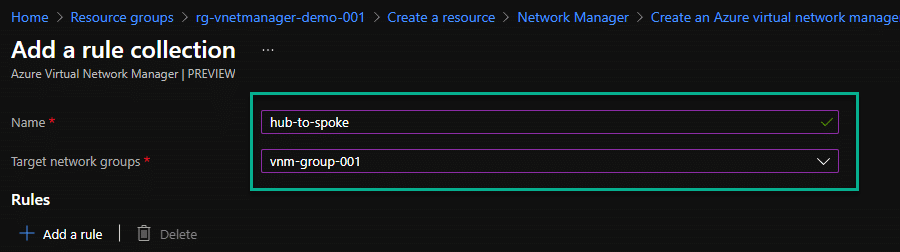
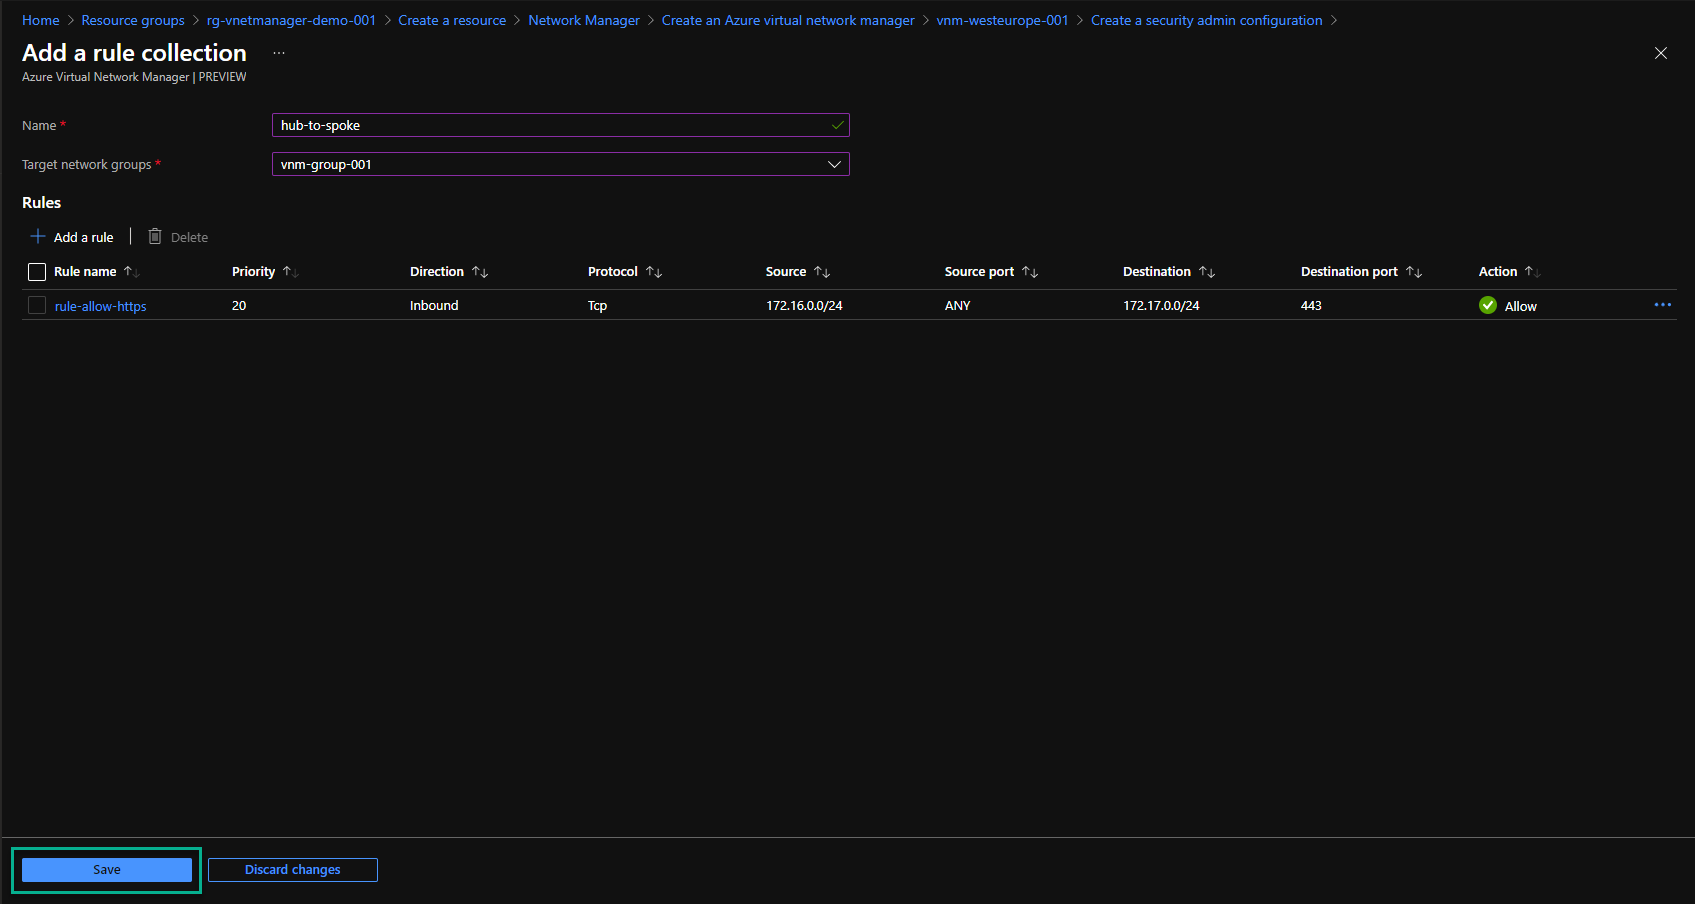
To create the rules, I click on “Add a rule collection.” I will name my rule collection “hub-to-spoke” and select the target network groups.
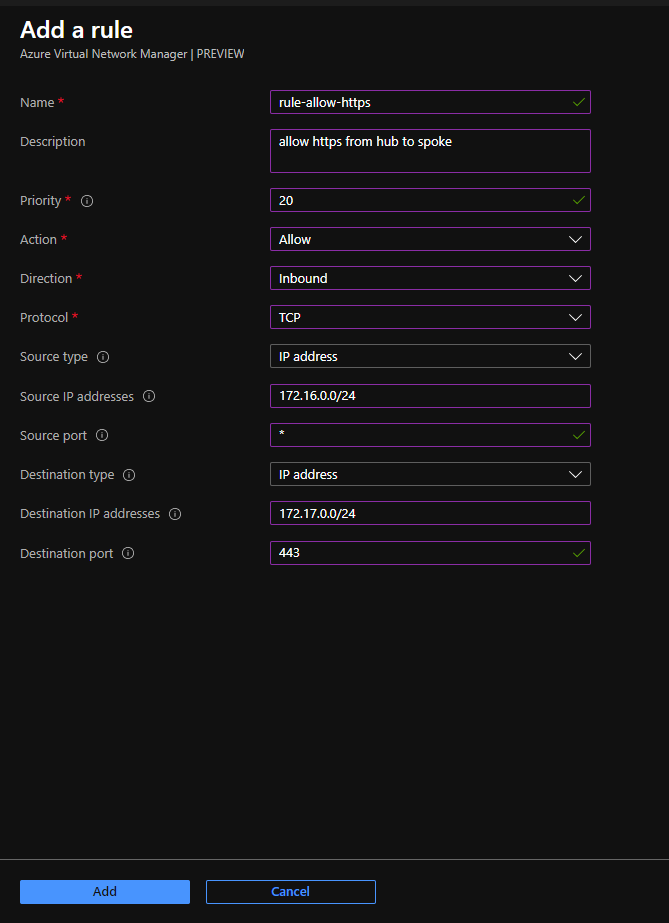
I can create a new rule by clicking on “Add a rule” and entering all the information below. I have created a rule that allows HTTPS traffic from the hub vnet to the spoke vnet with the 172.17.0.0/24 address space.
I can now save my configuration by clicking on “Save.”
I can add more rule collections if needed, but I will click on “Add” to add the configuration to the VNM.
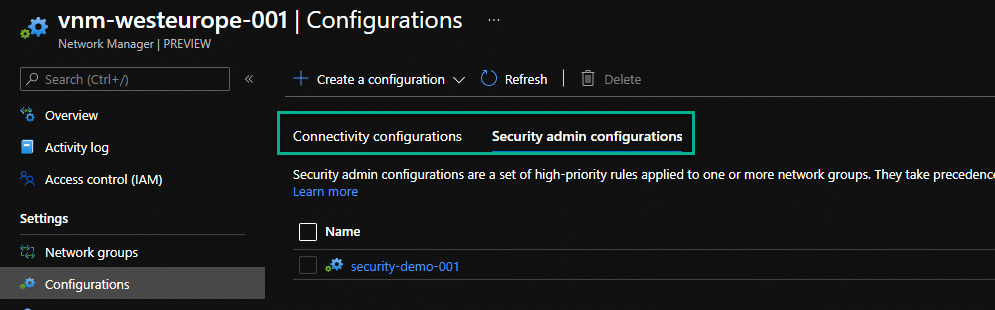
I now have a connectivity configuration and a security configuration. I can view them on their own tab in the overview.
Deployment
Now, I want to deploy my configurations, and I will start with the connectivity configuration. I go to the “Deployments” section and click on “Deploy a configuration.”
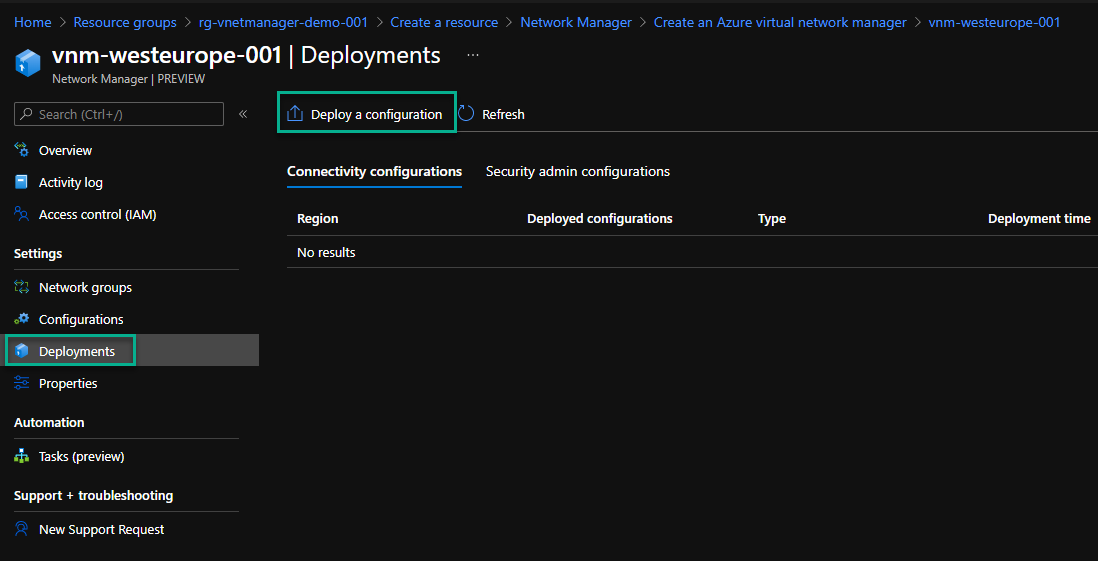
I select “Connectivity” and then my “connectivity-demo-001” configuration. I can choose which regions I want to deploy the configuration to. In my case, I only have resources in “West Europe,” so I choose that region and click “Deploy.”
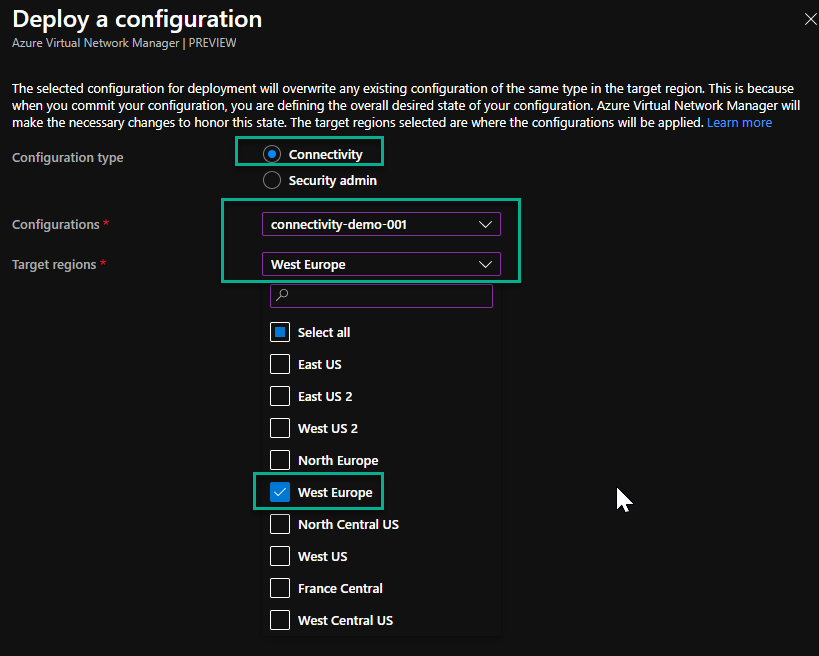
I get a warning if I have selected all the configurations I want to deploy. I click on “OK” to accept the deployment.
I follow the same procedure to deploy my security configuration.
Verify the connectivity deployment
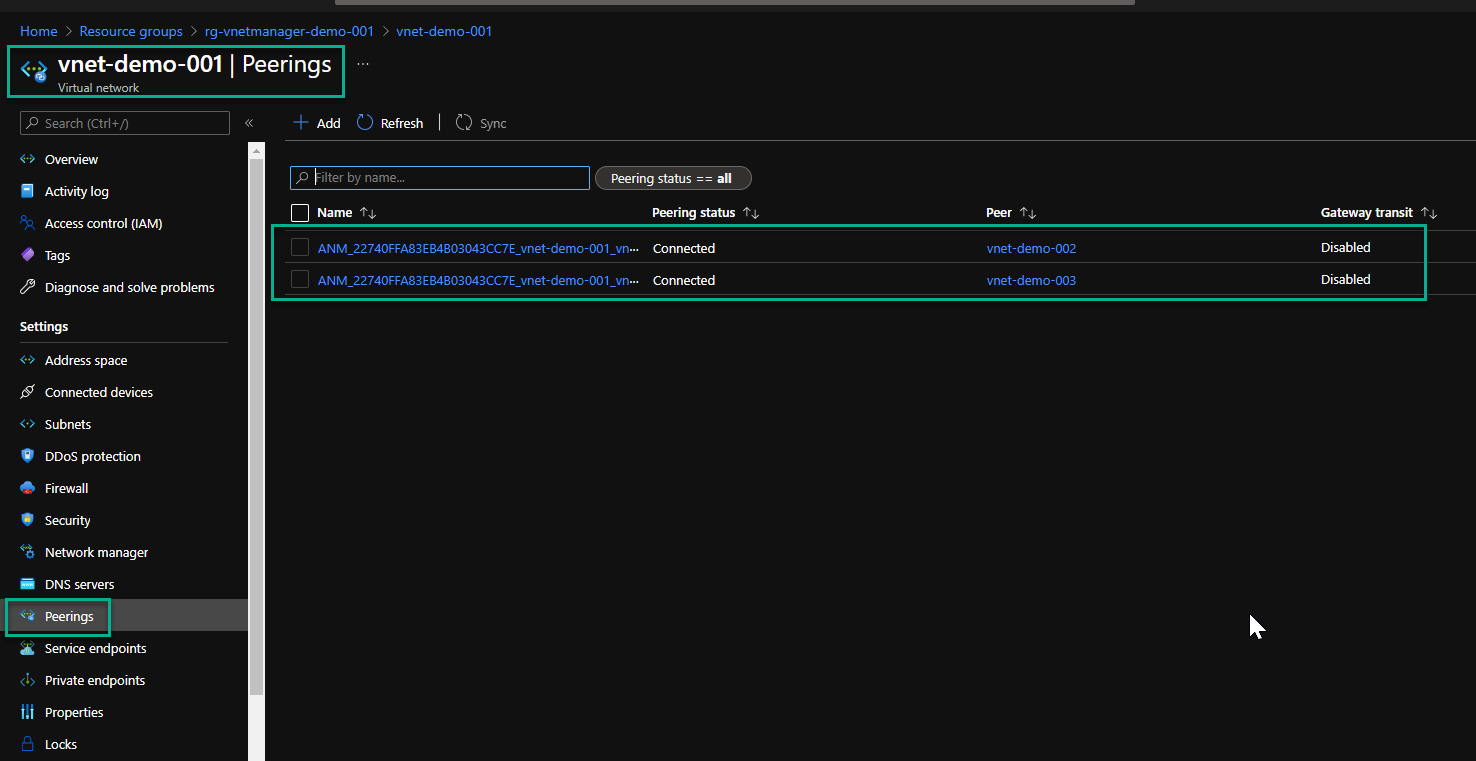
I will go to my “vnet-demo-001” vnet and check the peerings to verify my connectivity deployment. I can see that it has created two new peerings for me with auto-generated names, and the state of these peerings is “Connected.” So my deployment was indeed successful, and I didn’t have to do any manual peering for the connectivity.
Verify the security deployment
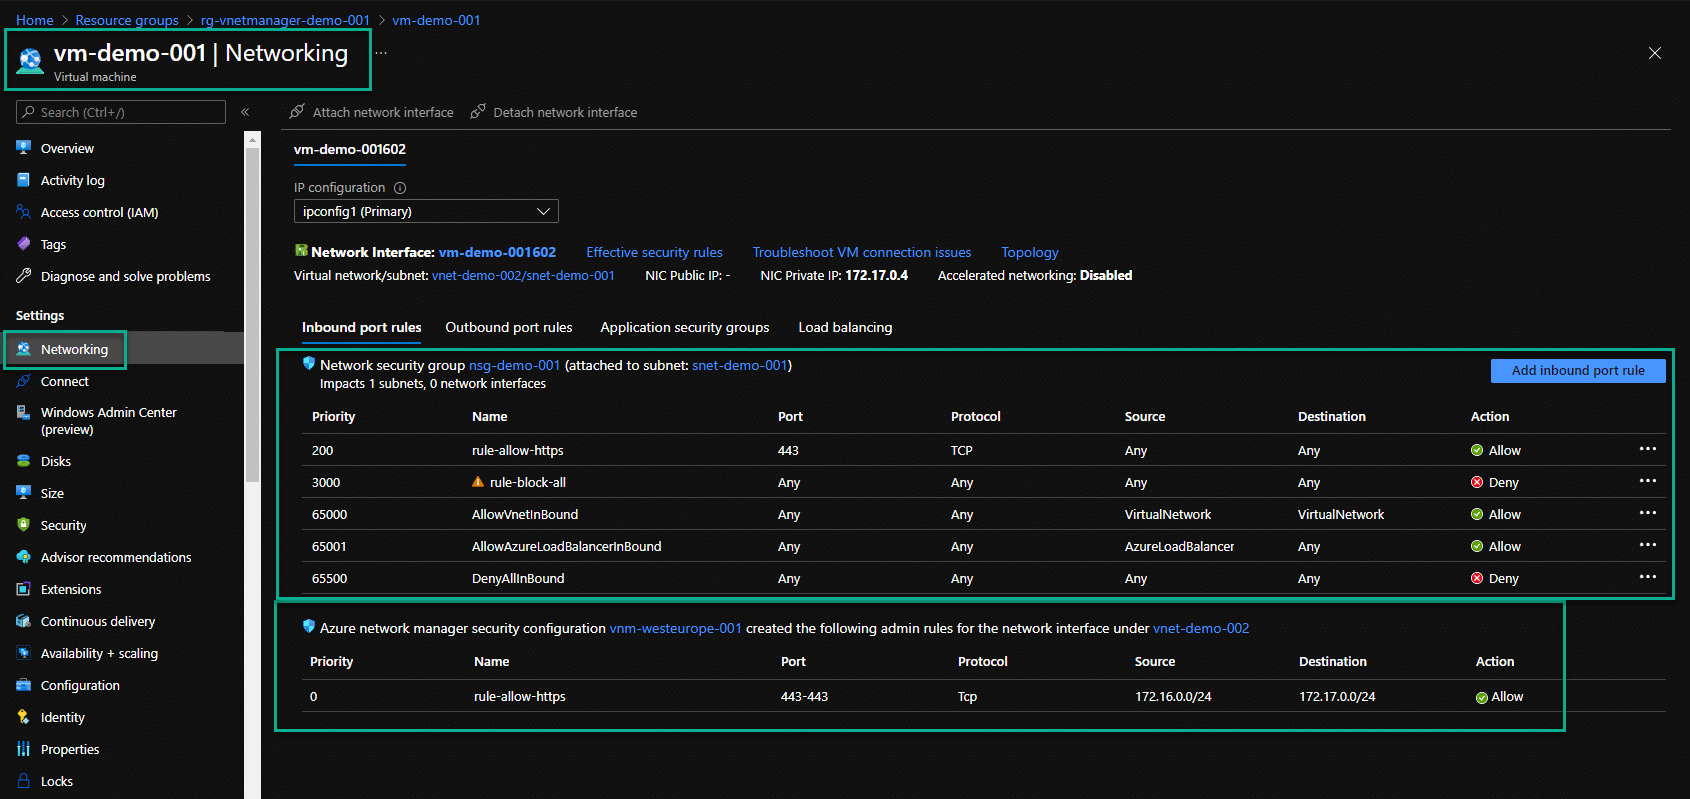
I will go to my virtual machine “vm-demo-001” and to the “Networking” section to verify my security deployment. I can see that I have both NSG rules and VNM rules applied. I can only see the VNM rules if the VM is running, I am not sure why this is the case, but I assume that the rules are applied to the VM agent at run time.
Conclusion
I have now shown you how to use the virtual network manager in Microsoft Azure, so what do I think about it? Well, for now, I am not a huge fan, to be honest. The connectivity part is OK, but creating a hub/spoke or mesh network without the VNM is still pretty easy. I normally deploy using code, so I have templates for the deployment, and I can set up pipelines to roll out any changes or additions to this network topology. I feel that the VNM actually complicates the configuration since naming conventions are none existing. For any troubleshooting, I need to check each vnet anyway manually, so no overview is presented in the VNM plane.
The security configuration is actually pretty good and combines rules in one place, but again I need to check each resource for effective rules. Also, I found that the rules only apply to virtual machines so far, but that might change when the service is out of preview.
My conclusion, for now, is that I will keep an eye on the service and do some more tests. Still, for now, I will go with infrastructure as code and have my rules for NSG and Azure Firewall deployed with pipelines so I can have great flexibility and version control for all my rules and configurations. All rules and configurations for VNM can be created as code and deployed with pipelines, but I don’t really see the added benefit to the service just yet.
I hope this post has been informative and if you have any feedback, please reach out to me on this site or Twitter @mracket.