Credits and sources
Microsoft Learn
https://learn.microsoft.com/en-us/azure/bastion/bastion-overviewIntro
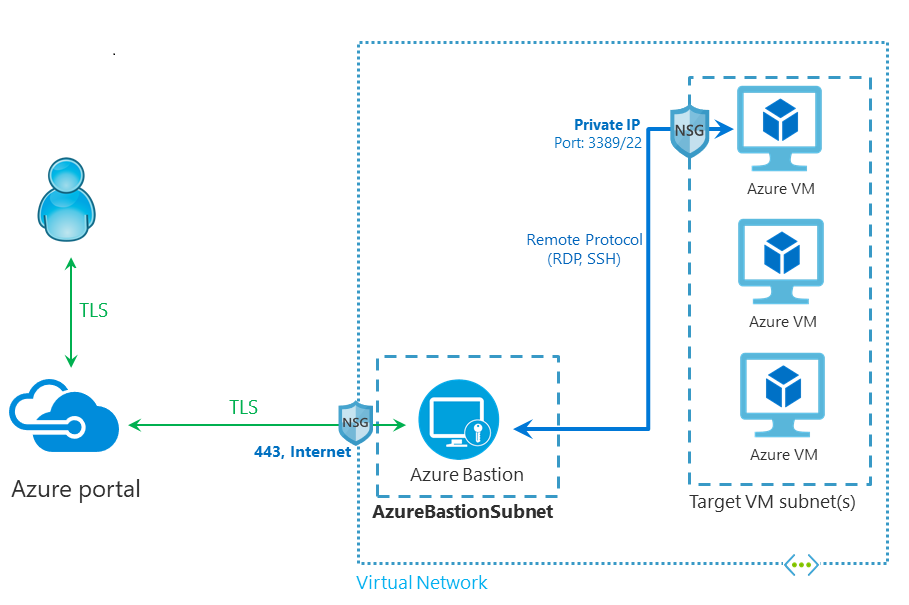
I want to look closely into the Azure Bastion service in this post. Azure Bastion is a service that provides secure remote access to Azure virtual machines. Bastion supports RDP and SSH for managing the virtual machines, and all traffic will use TLS for security. One of the key benefits of Bastion is that the need for a public IP address on your resources is removed. The public IP will be placed on Azure Bastion, and this service will then act as a proxy for access to the resource. Since your virtual machine doesn’t have a public IP address, you don’t have to worry about them being exposed externally, and port scanners won’t be able to detect them.
Microsoft does state that since you are using Azure Bastion, you don’t need to worry about securing your virtual machines. I disagree with this since virtual machines can be exposed in multiple ways, and external access isn’t the only thread vector.
Image from: https://learn.microsoft.com/en-us/azure/bastion/bastion-overview
Azure Bastion versions
Azure Bastion comes in two versions (SKUs), basic and standard.
The table below is from the official Microsoft documentation and can be found on this link: https://learn.microsoft.com/en-us/azure/bastion/bastion-overview
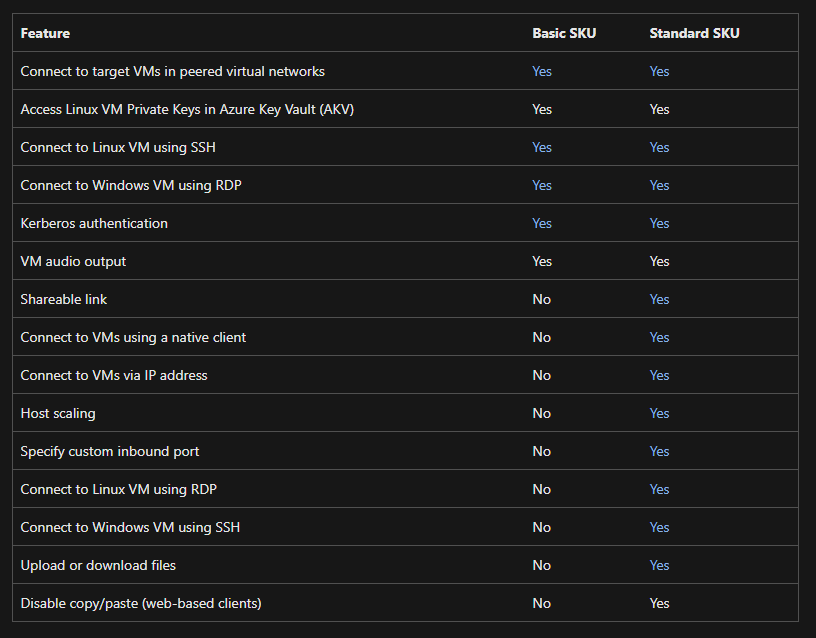
One of the main differences between the two versions is that it is possible to use native clients to connect to Bastion if you select the Standard SKU.
Deployment of Azure Bastion
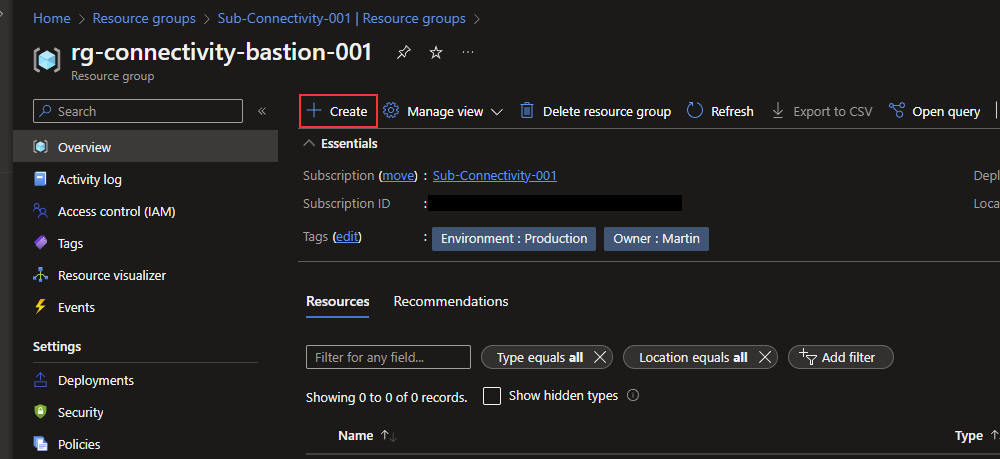
Azure Bastion is deployed to a virtual network and supports vNet peerings. For this reason, I will be deploying Bastion to my hub network in this demo. When deploying to a production environment, you must consider the blast radius and other security boundaries.
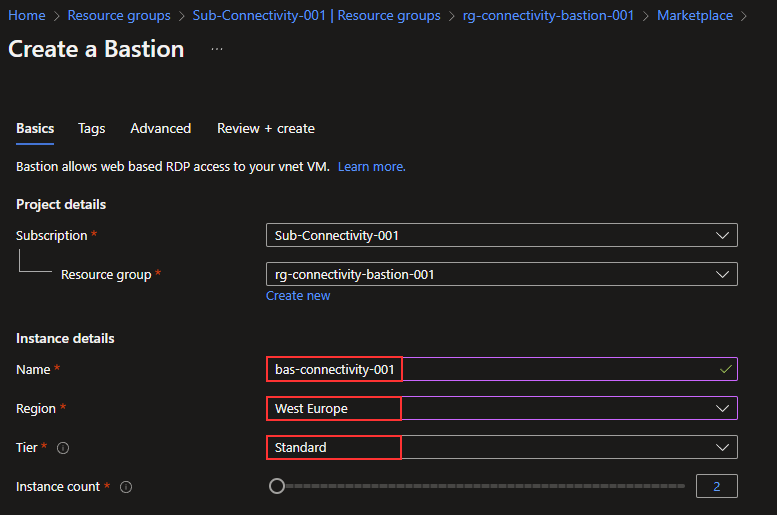
I have a resource group called “rg-connectivy-bastion-001,” which I will use for my deployment. I will click on “Create.”
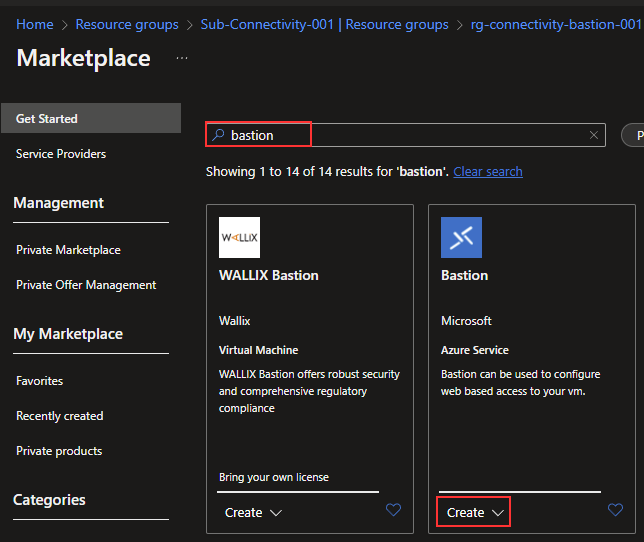
I will search for “Bastion,” click “Create,” and select “Bastion.”
I will name my Bastion resource “bas-connectivity-001,” select the “West Europe” location and choose the “Standard” tier.
In this case, I will select my virtual network, “vnet-connectivity-001.” When I do this, I get a warning saying I don’t have an Azure Bastion subnet. I did this to show you can add this while creating the resource. It is important to create a NSG that will be attached to the Bastion subnet, I will show this in the next section in this guide. Now, I will click on “Manage subnet configuration” to fix the error.
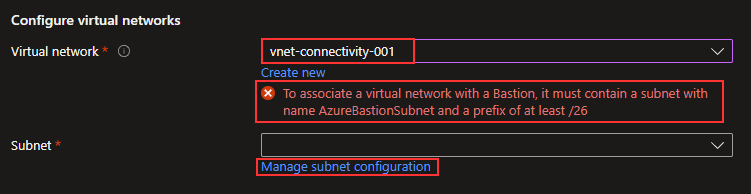
I will click on “+ Subnet.”

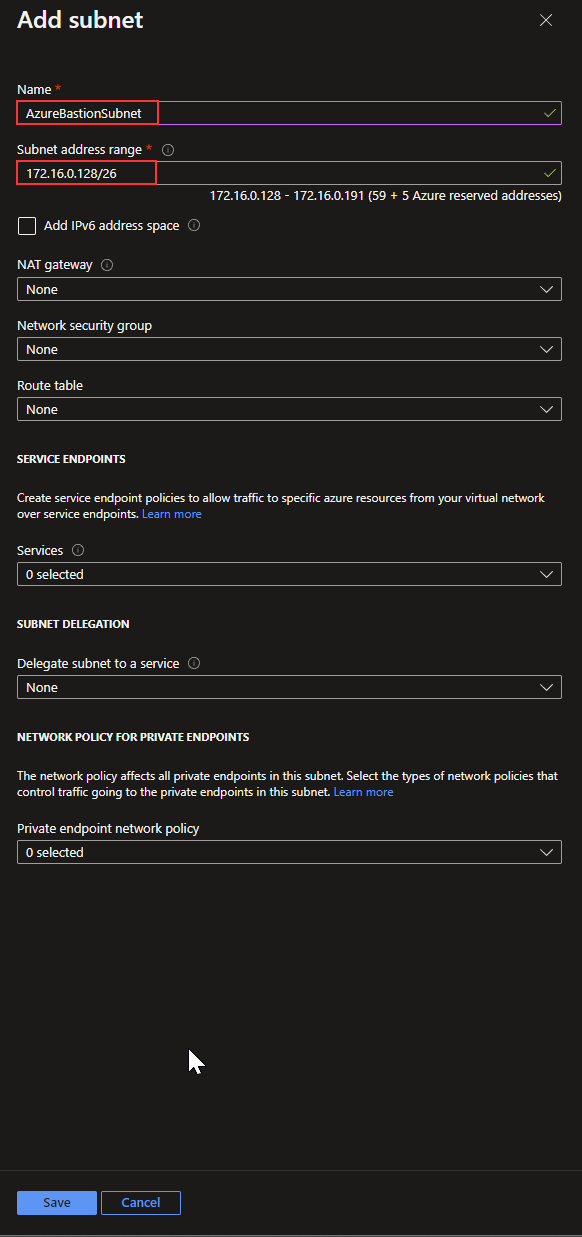
I will name the subnet “AzureBastionSubnet,” which is required for this to work. I will provide a /26 subnet, in this case, “172.16.0.128/26,” and click “Save.”
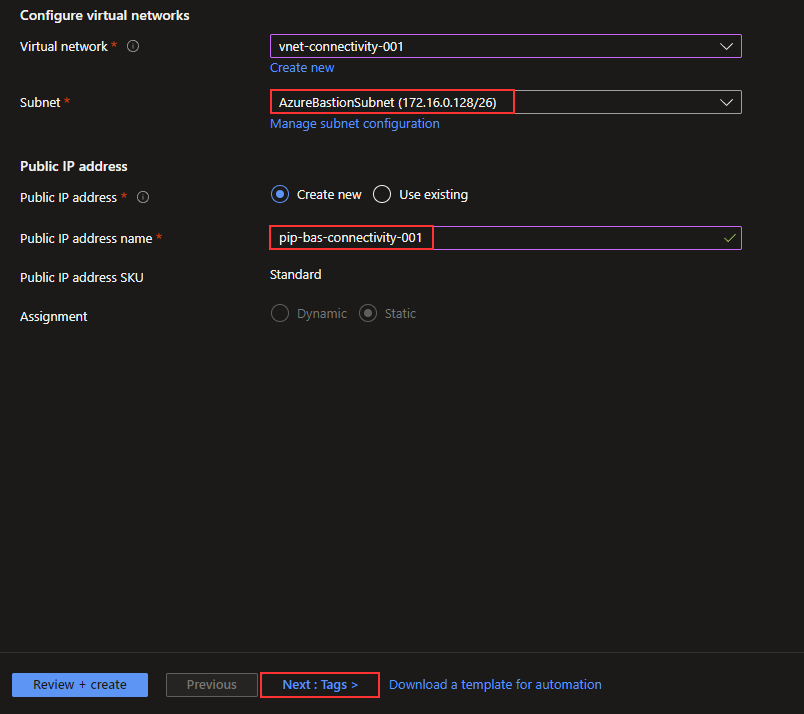
When the subnet is created, I can return to the Bastion deployment. The guide will auto-select the new subnet. I will create a new public IP, name this “pip-bas-connectivity-001,” and click on “Next: Tags >.”
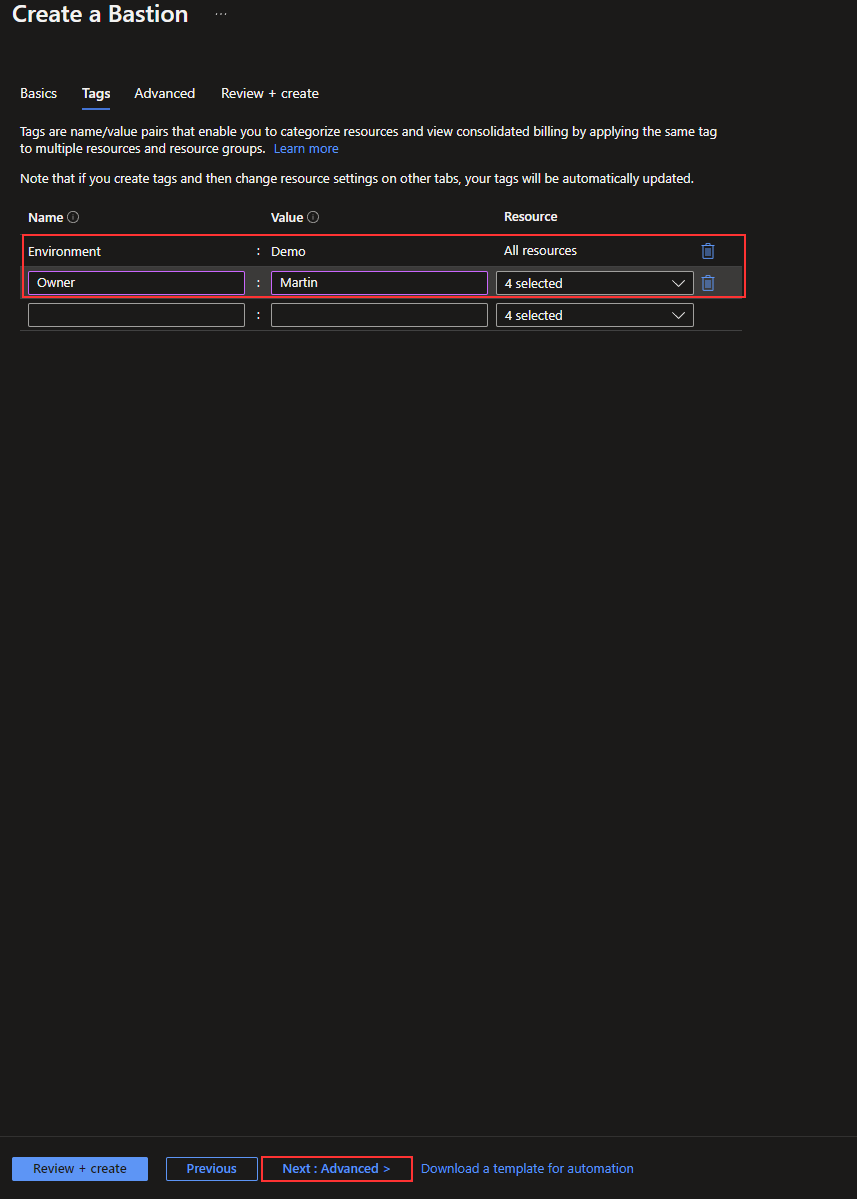
I will add a few tags and click “Next: Advanced >.”
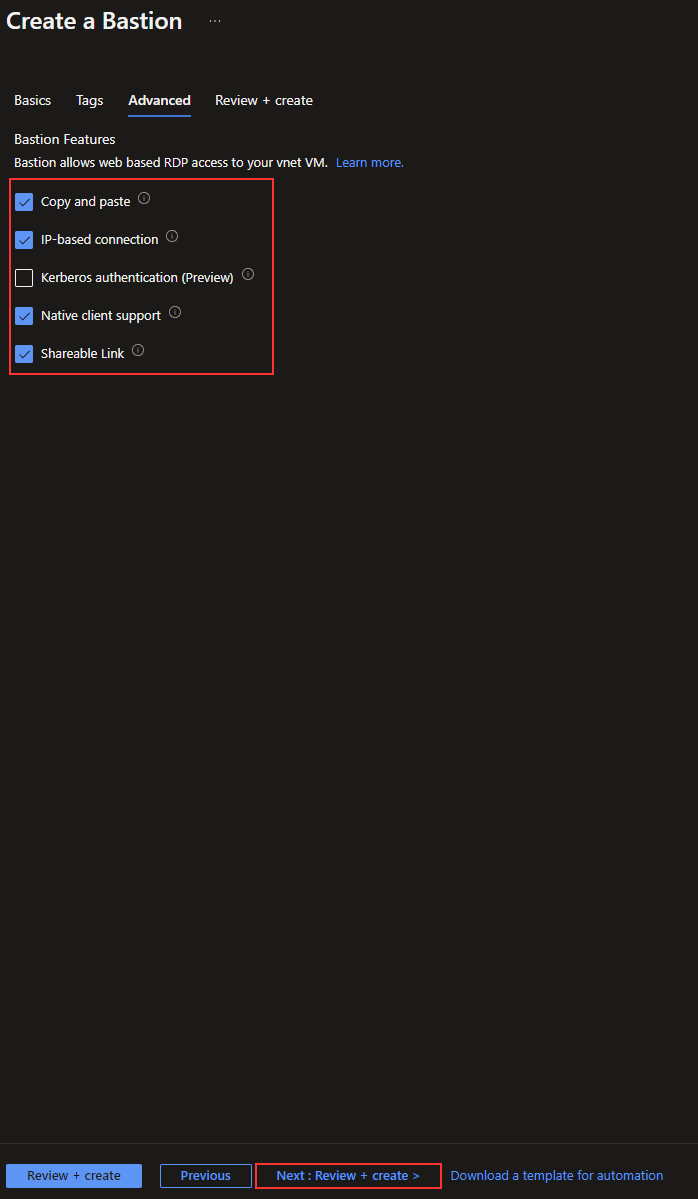
I will select most options on the advanced page. I only leave the preview feature out in this case. I click on “Next: Review + create >.”
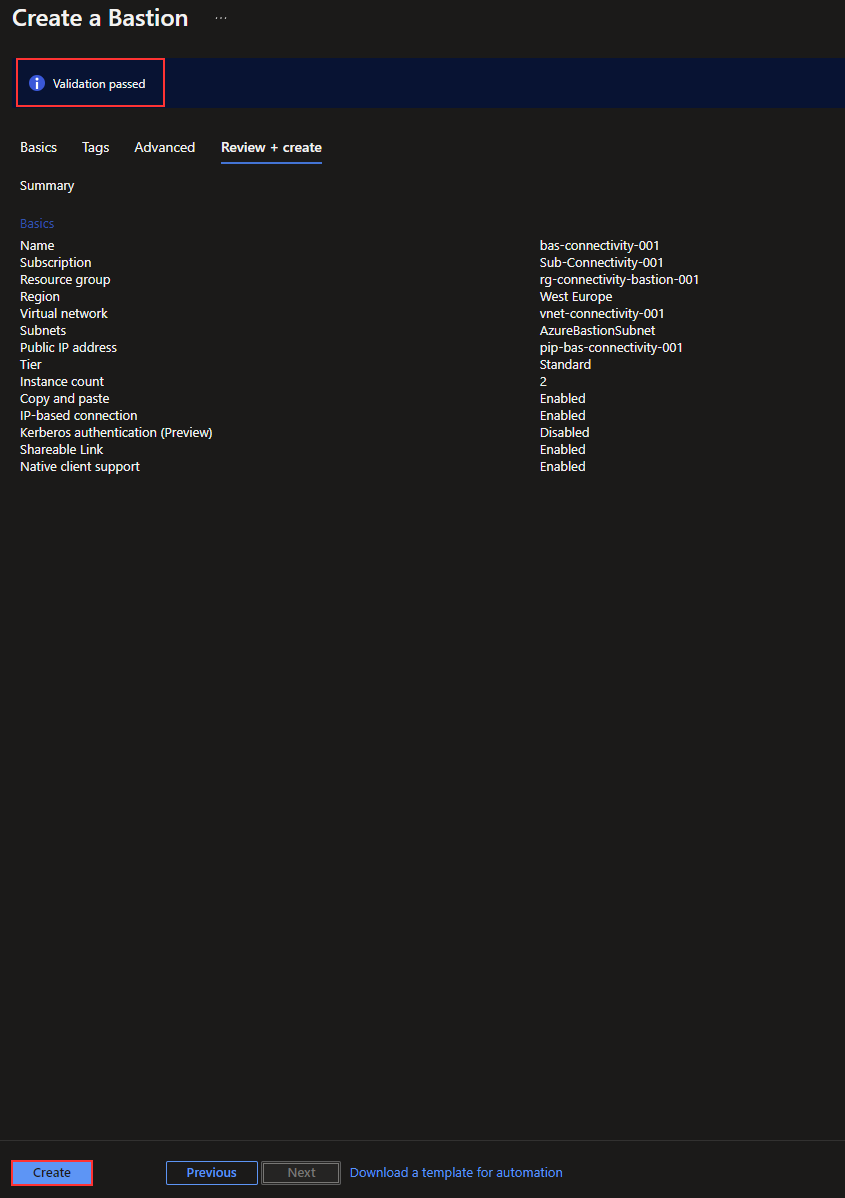
The validation passed, and I can now click on “Create” to deploy the Bastion resource.
The deployment is now done, and I can deploy the NSG for the Bastion subnet.
Network security group for Bastion subnet
As mentioned in the previous section, adding a Network Security Group (NSG) to the Azure Bastion subnet is essential. This is impossible to do during the creation of the subnet, at least not at the time of writing this post. So, now I will create the NSG and attach it to the subnet.
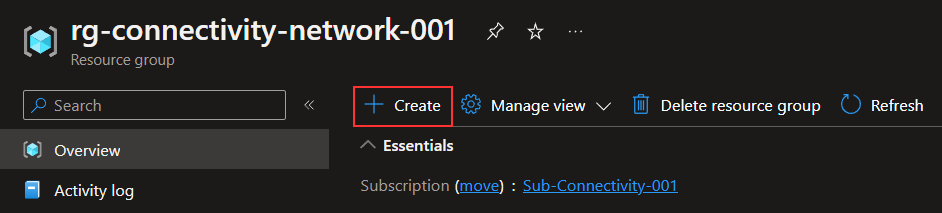
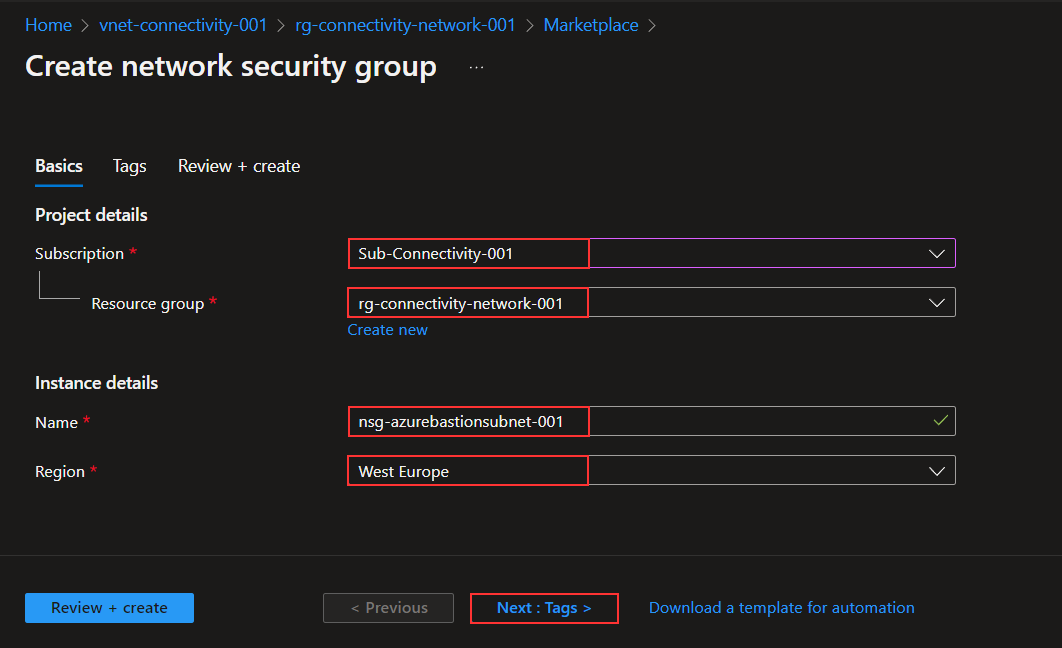
I will deploy the NSG into the same resource group as my vNet. In my case, this is “rg-connectivity-network-001.” I will click on “Create.”
I will search for “network security group.”
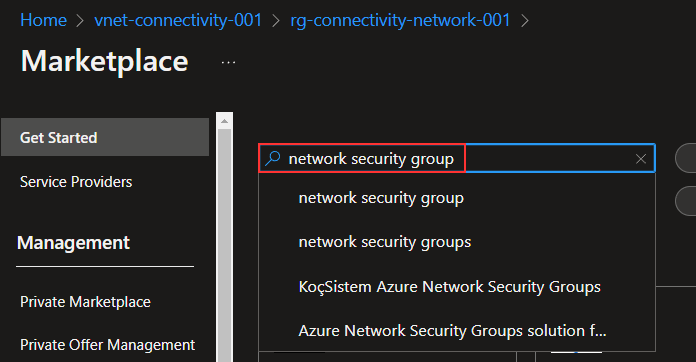
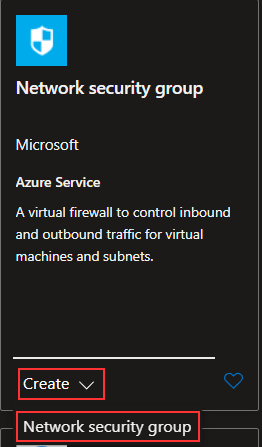
I will click on “Create” and “Network security group.”
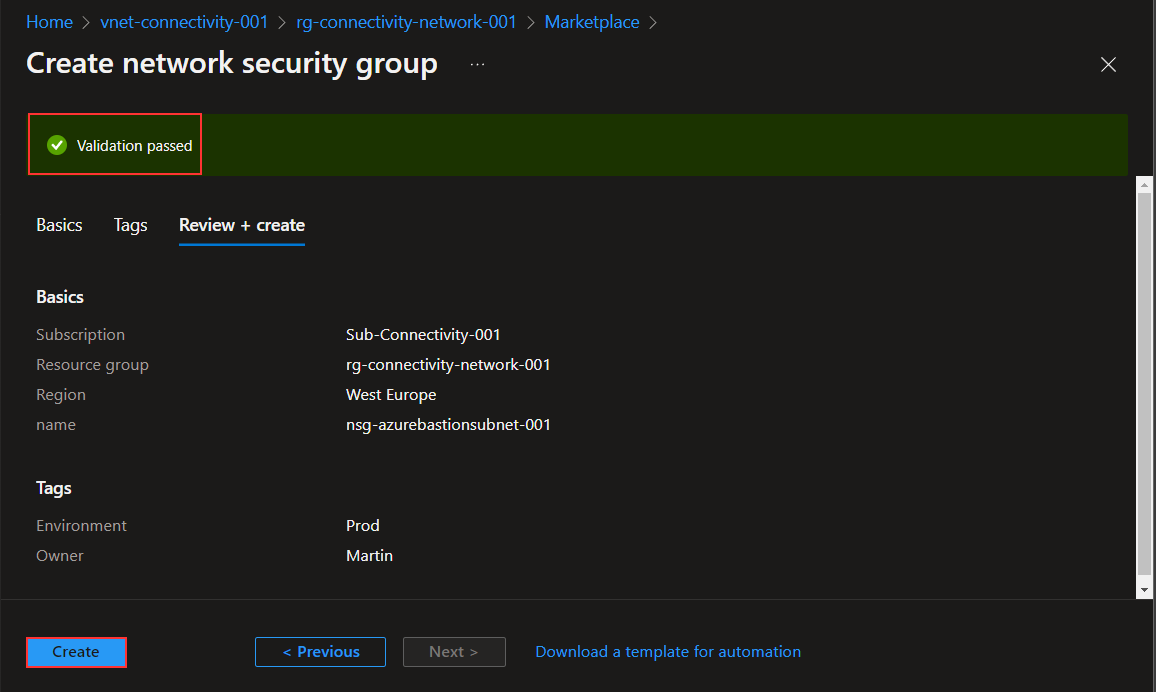
I will ensure I selected the correct subscription, resource group, and location and name my new NSG “nsg-azurebastion-001,” and click “Next: Tags >.”
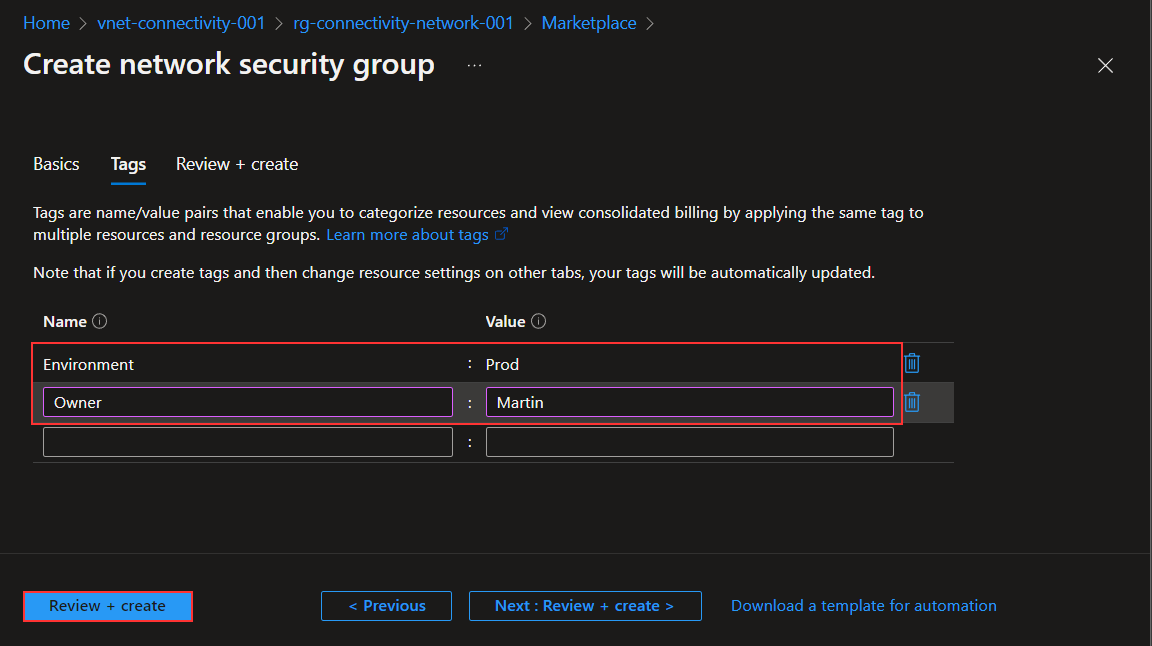
I add a few tags and click “Review + create.”
The validation passes, and I click “Create.”
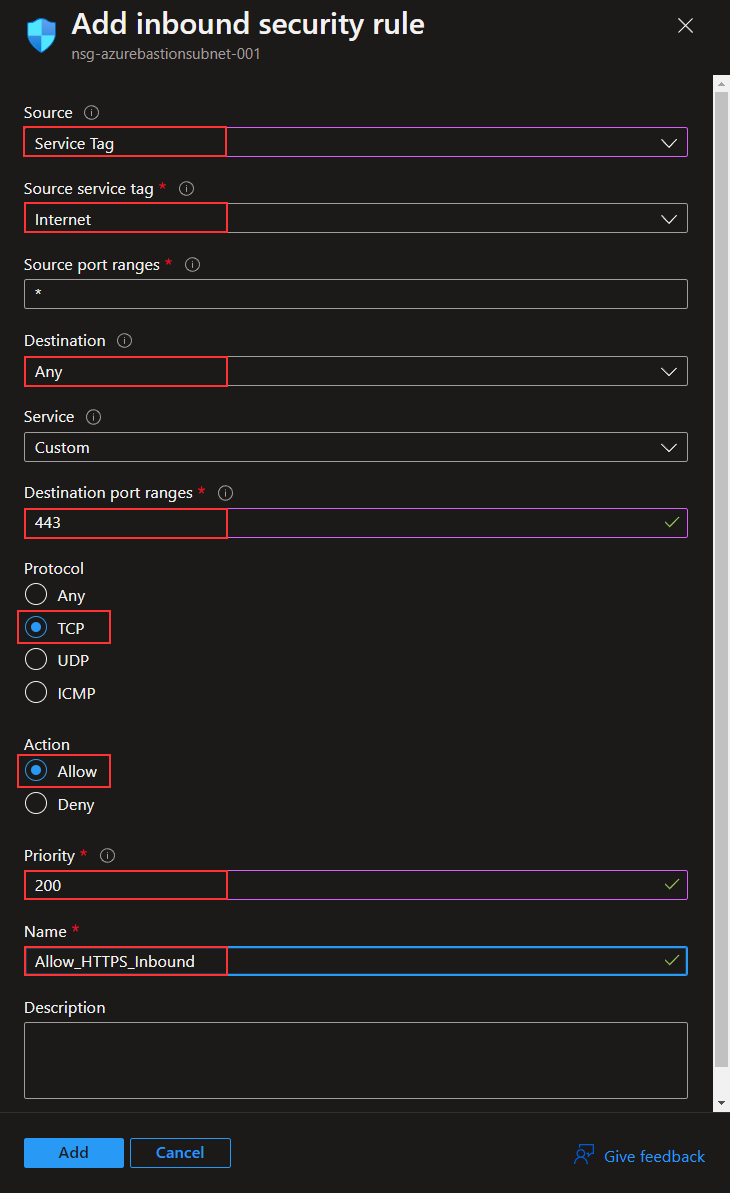
When the NSG is deployed, I have to create a few rules. I will start with the inbound rules, and I am using the Microsoft guidelines for this, which can be found here:
https://learn.microsoft.com/en-us/azure/bastion/bastion-nsgI am creating three rules for port 443, all with the destination “Any.” The source for each is different, one for “Internet,” one for “GatewayManager,” and one for “AzureLoadBalancer.” The below image is the creation of the first rule. The last two are created the same way but with different sources.
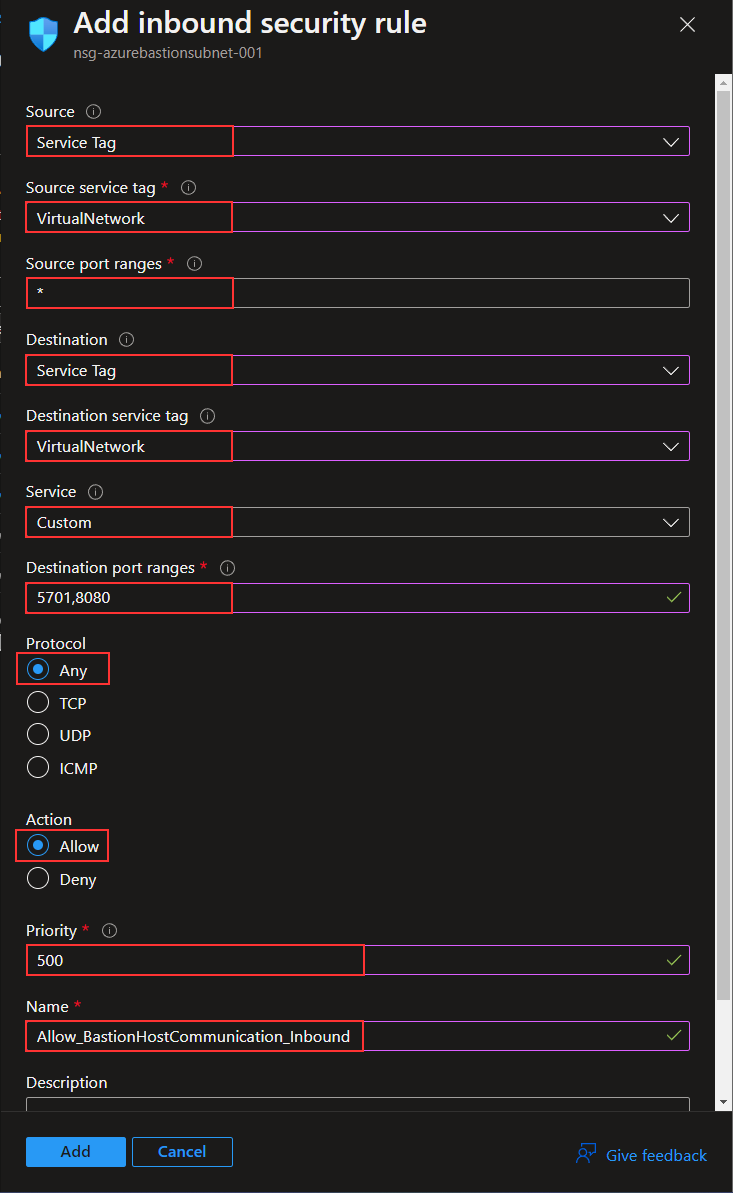
The last inbound rule I need is for Azure Bastion communication. The ports are 5701 and 8080, and the rule is created as shown below.
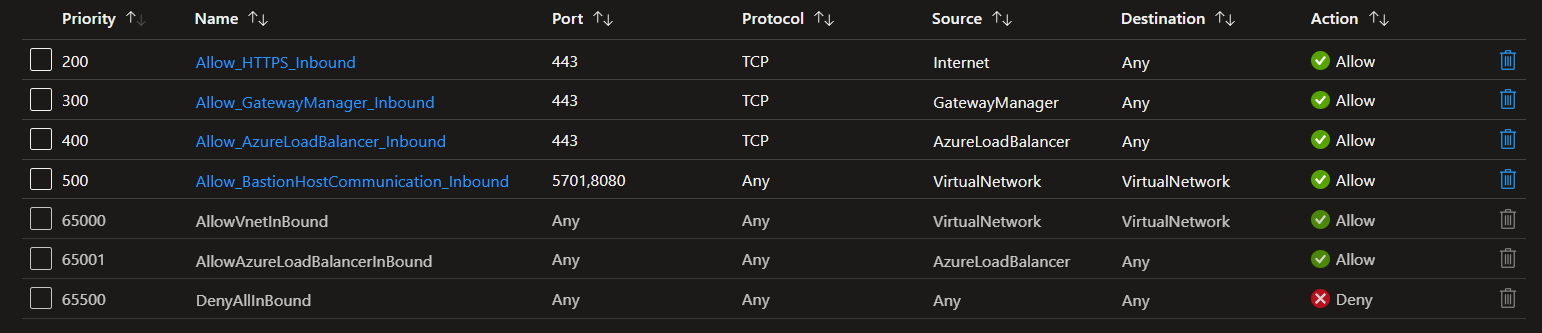
With the rules created, the inbound section of my NSG looks like the image below.
I need to create a few outbound rules as well. The result is shown in the image below.
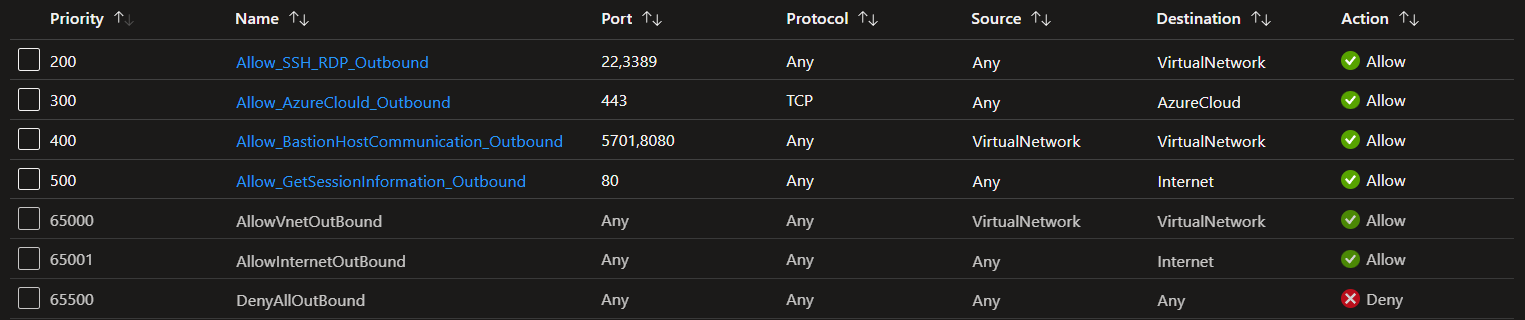
The NSG protecting my virtual machines can also be locked down. When you do that, you need to open SSH and RDP from the Azure Bastion subnet. For my environment, that rule is shown below.

Connect to a virtual machine
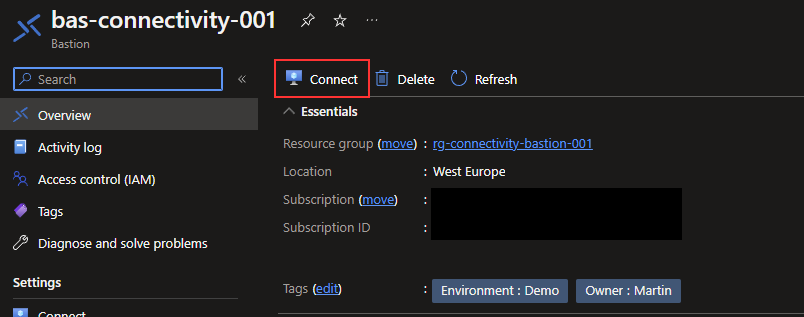
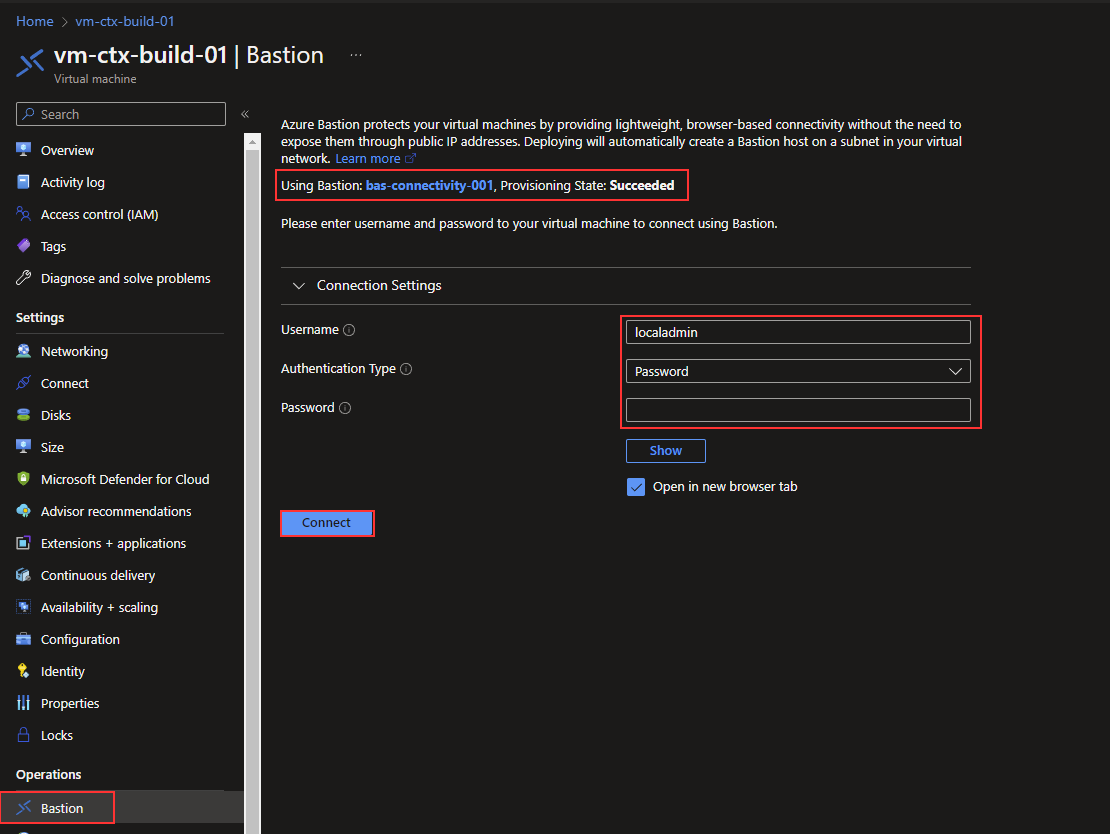
I can use the Bastion resource page to connect to a virtual machine, but this can also be done from the virtual machine directly. I will first show how to do it from the Bastion page. From the “Overview” page, I can click on “Connect.”
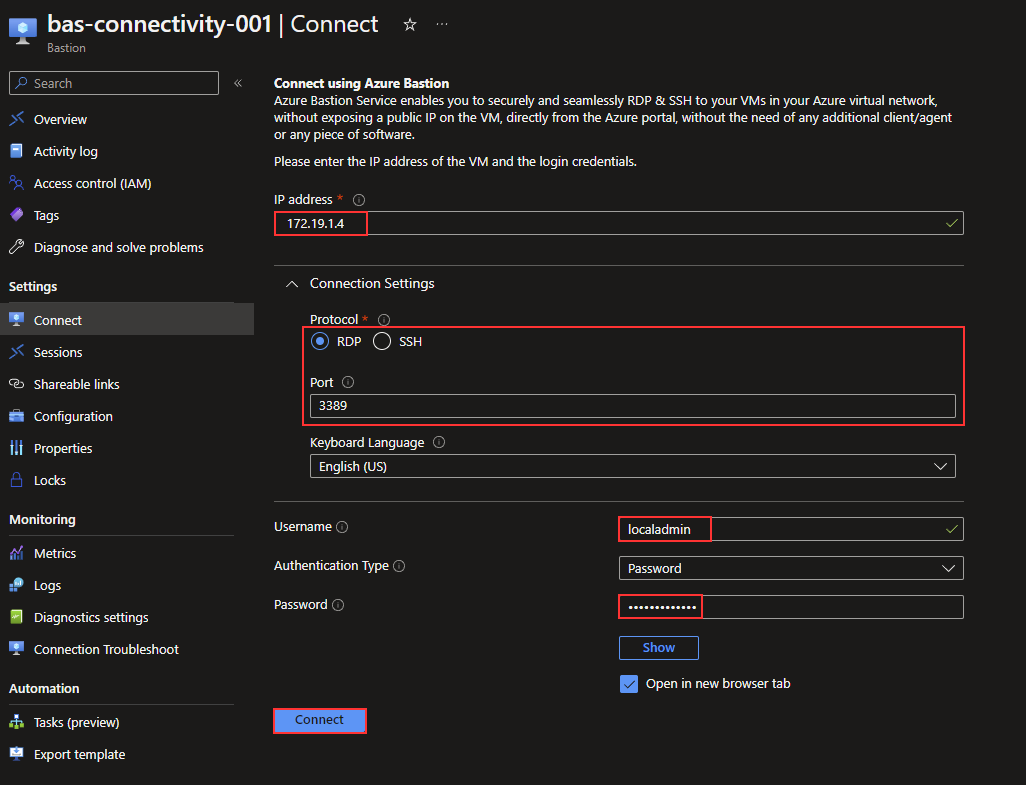
I will add my virtual machine’s internal IP address and fill out a username and password. This is a Windows virtual machine, so I will use RDP to connect to it.
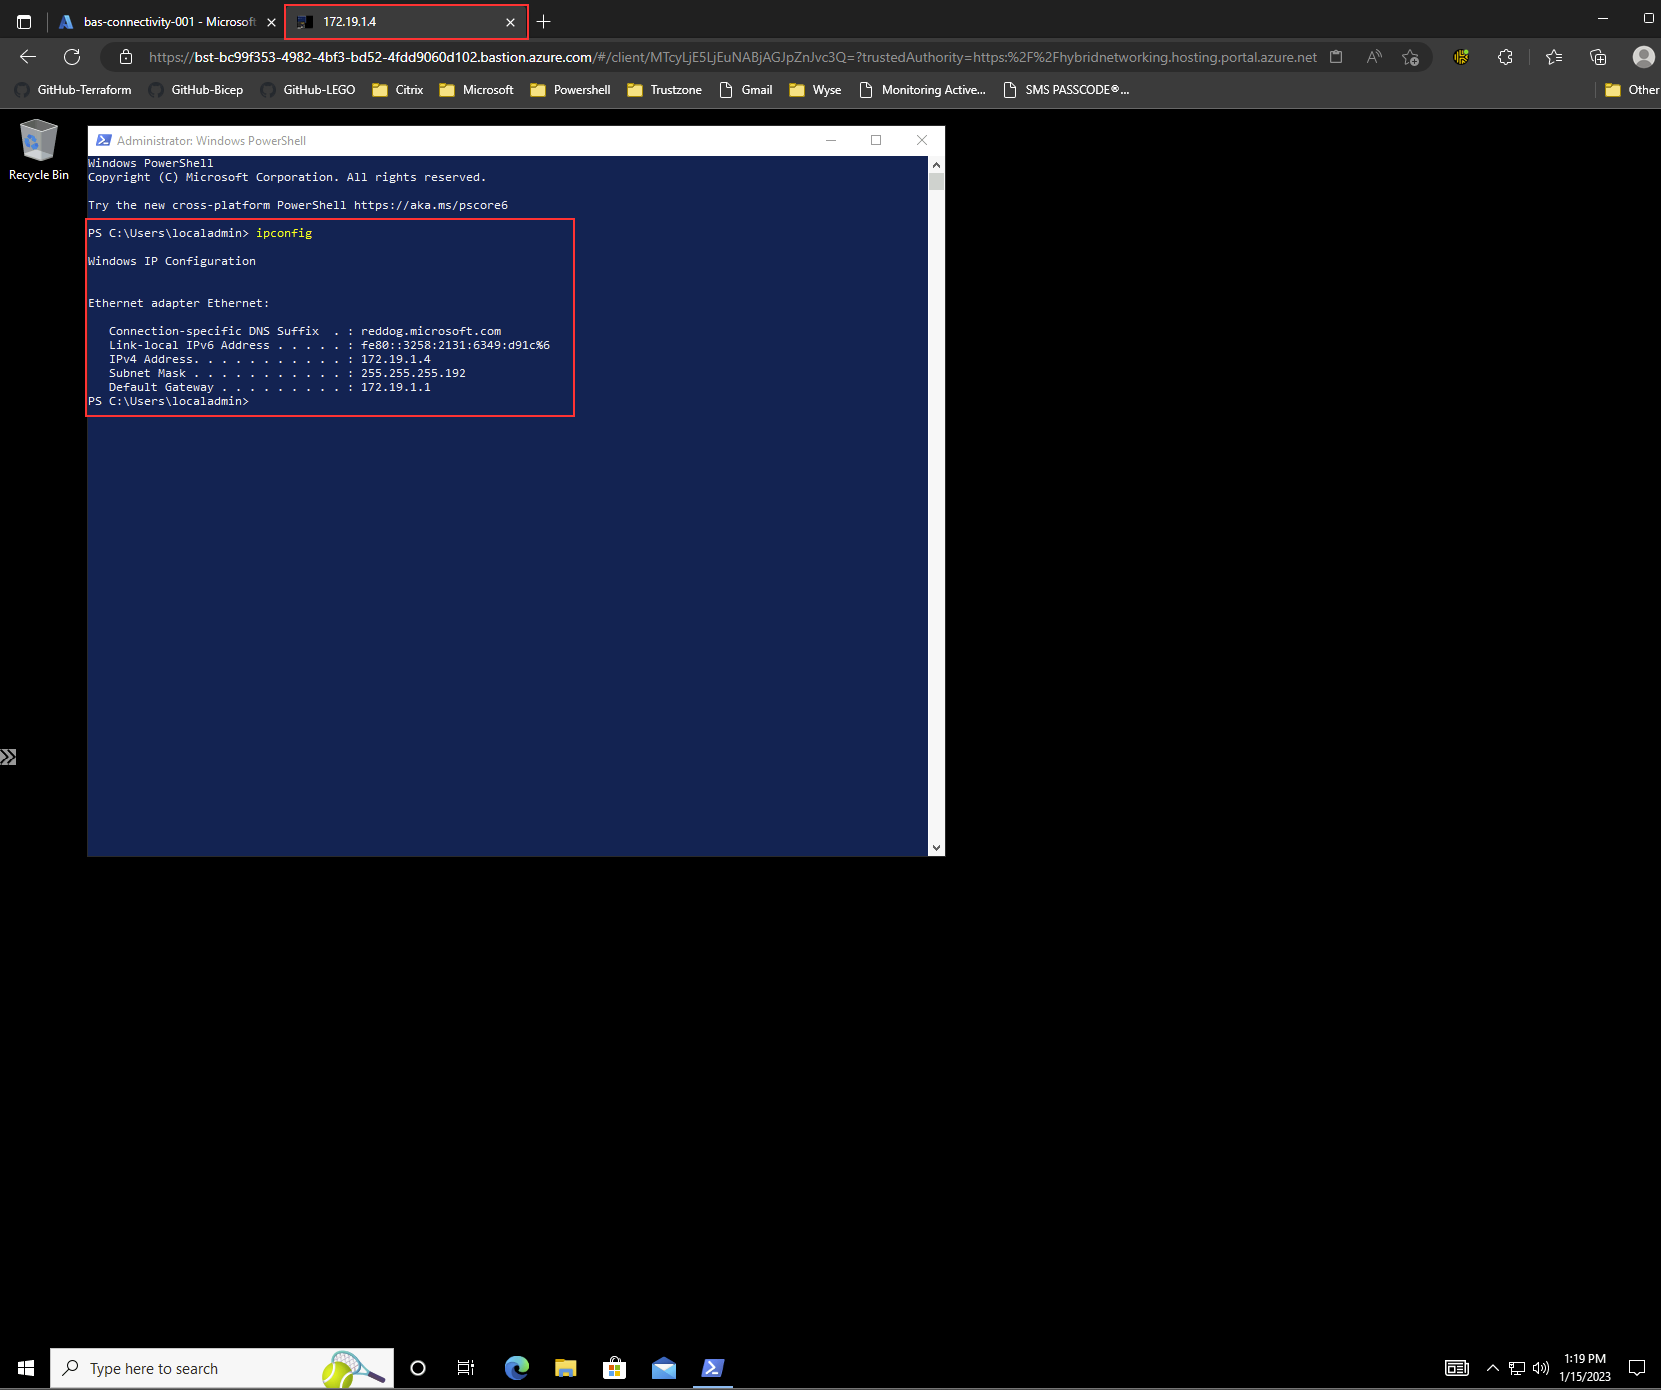
As shown in the picture below, the remote connection is opened in a new tab in Edge using HTML5. I am using Azure Bastion on the URL, and I did indeed connect to the IP address I added in the connection settings before.
If you want to connect to the virtual machine from the virtual machine resource page, you can do this as well. You can find “Basion” on the left navigation pane on the resource page, and then you will have the same connection options as I showed before. Notice that you can see which Bastion resource is being used to connect to the virtual machine.
Connect to a virtual machine using a native RDP client
Connection to a virtual machine using the native RDP client (or SSH for Linux) is not as easy as I thought. I thought this would be just another button in the portal, but you need to use Azure CLI to create this connection. I have followed the guide from Microsoft to write this blog post. As mentioned in the credits, the guide can be found here:
https://learn.microsoft.com/en-us/azure/bastion/connect-native-client-windowsAzure CLI must be installed for connections with the native clients to work. If you still need to install it, you can follow this documentation on how to do so.
https://learn.microsoft.com/en-us/cli/azure/install-azure-cliFirst, I need to log in to my Azure environment with Azure CLI, and I also have to select the subscription I have for my Bastion resource. From my PowerShell terminal, I use the code below.
az login
Edge will pop up with a sign-in window, and I will use the account with the correct permissions.

I am now signed in.

I now need to select the correct subscription. This is done by the following command, I have masked my subscription ID, but you get the idea.
az account set --subscription 6e000000-0000-0000-0000-000000000000
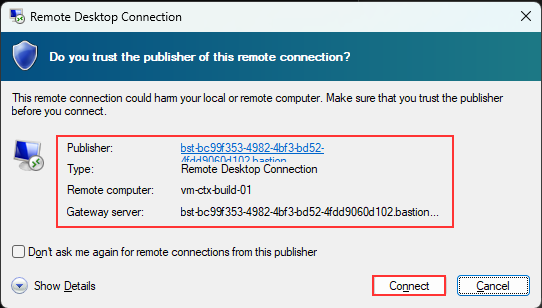
Now that I am authenticated and in the correct subscription, I can connect using RDP from PowerShell with the command below. The target resource id is the virtual machine you want to connect to.
az network bastion rdp --name "bas-connectivity-001" --resource-group "rg-connectivity-bastion-001" --target-resource-id "/subscriptions/6e000000-0000-0000-0000-000000000000/resourceGroups/rg-citrix-build-001/providers/Microsoft.Compute/virtualMachines/vm-ctx-build-01"
I can see the publisher and gateway server used for the connection on the RDP connection. I will click on “Connect” to proceed.
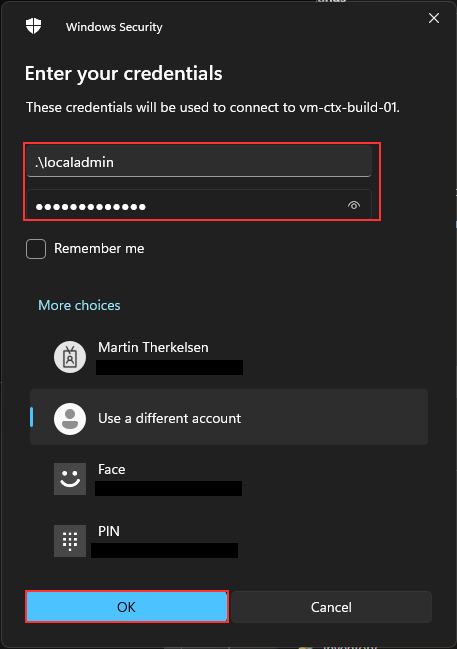
Next, I will fill in my virtual machine login information and click “OK.”
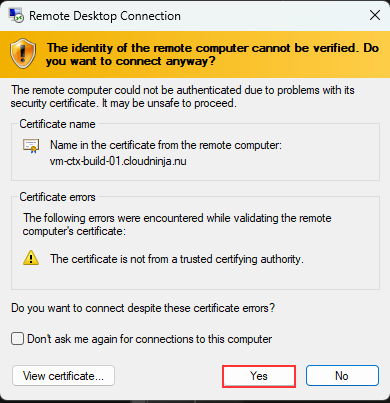
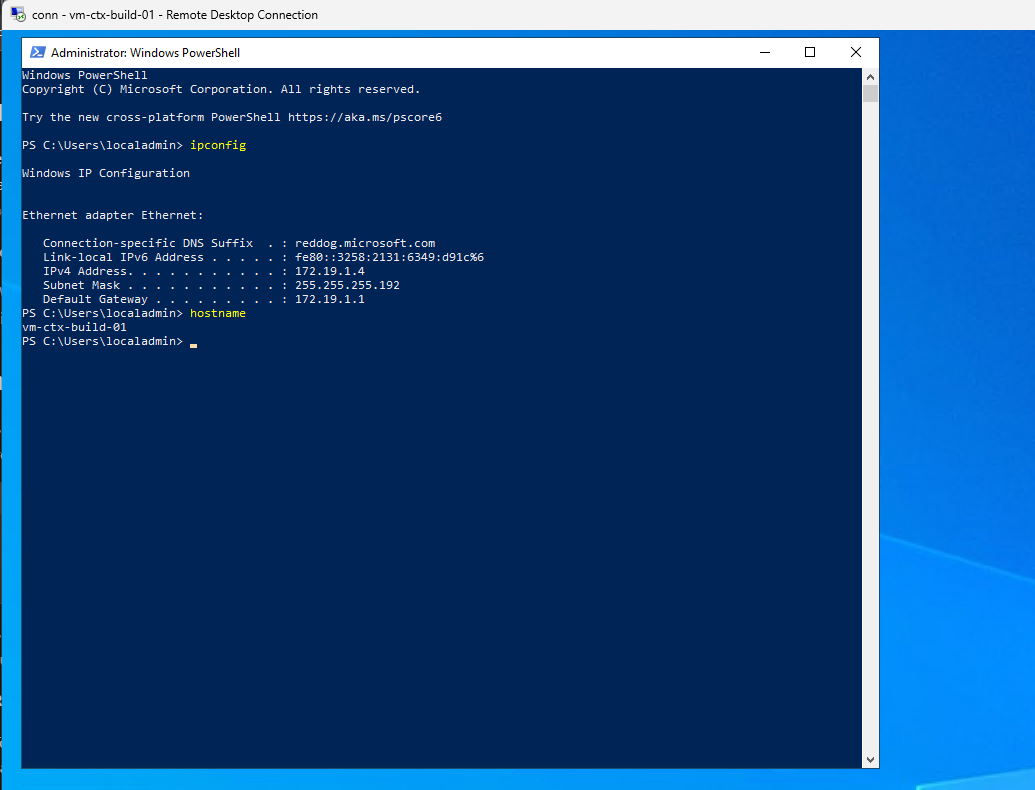
I will accept the certificate warning, and then I am logged into my virtual machine using a native RDP client.
Azure Bastion pricing
The pricing for Azure Bastion can be found here.
https://azure.microsoft.com/en-us/pricing/details/azure-bastion/When writing this blog post, the basic SKU will cost me approximately 130 € per month + traffic, and the standard SKU will cost around 200 € per month + traffic. These prices may differ from your environment, so always use the pricing calculator for your location and when you need it. Pricing might also be affected based on the agreement you have with Microsoft.
Conclusion
This post has focused on deploying and using Azure Bastion to enable a secure remote connection for Azure virtual machines. The service is straightforward to deploy, and using the HTML5 client to connect to the virtual machines is easy. Many I talked with about Bastion wanting to use the native RDP/SSH client for the connection, and while this is now possible with the standard SKU for Bastion, it is not as easy to use as I wished. I am working with Azure for all my work assignments, so it is easy to use Azure CLI for connections. However, many of my customers want to use Bastion for secure access for their software vendors, and these consultants aren’t working with Azure infrastructure and Azure CLI. For this reason, the HTML5 agent is the most likely to use, but this makes copying/pasting and upload of files hard.
The conclusion is that Azure Bastion has its place in securing access to Azure virtual machines. Still, there are also improvement options that would be much appreciated in the future.
I hope this post is helpful. If you have any comments or new topic requests, you can contact me on Twitter, LinkedIn, or anywhere else you might catch me.